In part three of this guide on PDF accessibility, we will go over how to make PDFs accessible to people with disabilities using Foxit PDF Editor Pro.
- Part 1: Introduction
- Part 2: Source Documents
- Part 3: PDF Remediation in Foxit
Table of contents
Introduction to remediation and tagging
- What does “PDF remediation” and “tagging” mean?
- How do I remediate and tag my PDF?
- Which version of Foxit do I need?
Remediating PDF Accessibility in Foxit
- Run Foxit’s Accessibility Checker
- Document > Color Contrast – Needs manual check
- Document > Tagged PDF – Failed
- Document > Primary Language – Failed
- Document Title
- Alternate Text > Figures alternate text – Failed
- Document > Logical Reading Order – Needs manual check
Checking PDF tags
- Open the Tags panel in Foxit
- Check tag order
- Check tag types
- Marking empty tags as background/artifacts
- Add missing tags
- Combine tags
Introduction to remediation and tagging
What does “PDF remediation” and “tagging” mean?
PDF remediation is another way of saying “adding accessibility features” to a PDF document. These features can include adding heading levels, alt text to images, and specifying a logical reading order, to name a few.
Most accessibility features are added by “tagging” a PDF.
PDF tags are invisible descriptors needed for people using assistive technologies to navigate the document. Tags are critical for making the document accessible.
How do I remediate and tag my PDF?
Learning how to add accessibility to your PDFs may seem overwhelming, but it’s a skill that you will get better and faster at with time and practice.
In this part, we will first address the most common PDF errors using Foxit PDF Editor Pro. Then we will go over how to correct issues with the tags.
Which version of Foxit PDF Editor do I need?
You will need to install Foxit PDF Editor Pro. If you do not have Foxit installed, please contact the OIT Service Desk (oithelp@uga.edu or call (706) 542-2139) and request Foxit PDF Editor Pro.
Remediating PDF Accessibility in Foxit
Run Foxit’s Accessibility Checker
The first step is to run Foxit’s Accessibility Full Check on your PDF. This tool will scan your document and report any accessibility errors it finds. It will also list a couple of checks that you will need to review manually.
To run the check:
- Open the PDF in Foxit PDF Editor Pro
- Go to Accessibility > Full Check
- In the “Accessibility Checker Options” window, click “Start Checking“
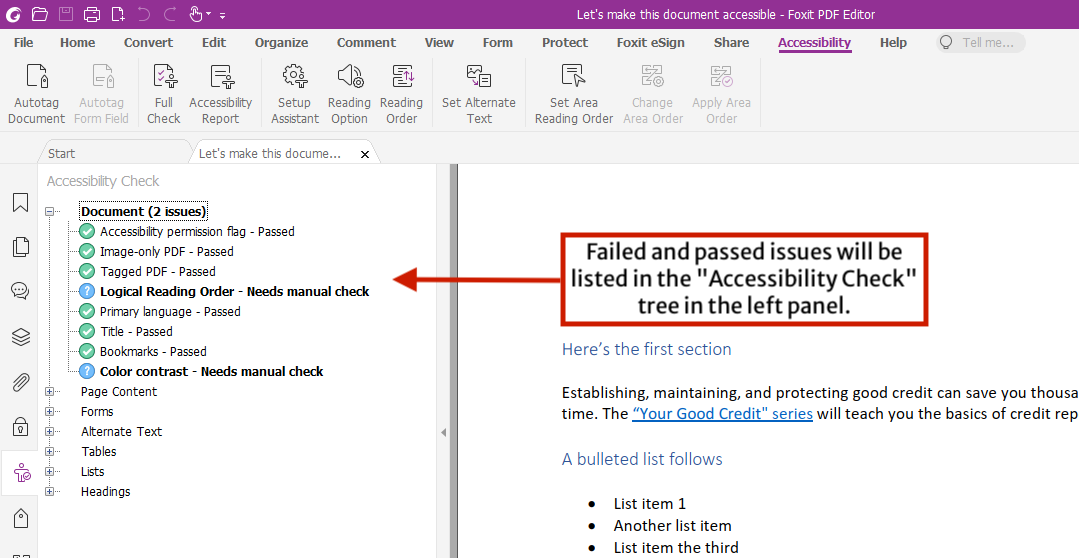
Failed and passed issues will be listed in the Accessibility Check tree.

Watch the video below for a demonstration of using Foxit’s accessibility checker:
Now let’s address some of the most common errors caught by the checker.
Checking for Sufficient Color Contrast
The accessibility checker will always report “Document > Color Contrast – Needs manual check.”
This is because the checker cannot tell if your document has sufficient color contrast. This means you will have to manually review the color contrast between text and its background in your PDFs.
Text with low color contrast against its background has poor legibility, and can be a problem for users with certain types of color blindness, or have trouble differentiating between similar colors.
For example, black text over a white background has enough contrast and is accessible. However, gray text over a white background may not have enough contrast.
Note that any templates you use from our Canva for Teams account will use color combinations with sufficient color contrast by default. You can also check the color contrast of two colors using WebAIM’s Color Contrast Checker.
If your document does not have sufficient color contrast, it is easier to fix the contrast in the source document (ie in Canva), export it to PDF, and then work on it in Foxit. Fix this issue first before moving onto tagging the PDF.
Document > Tagged PDF – Failed
If you see “Document > Tagged PDF – Failed” listed in the Accessibility Check, this means the PDF does not include any tags. This can happen if the source document is exported for print instead of for digital, or if you are exporting from a source that does not export tags yet (like Canva).
Fortunately, Foxit can automatically add tags for you. To autotag the document:
- Right click the “Document > Tagged PDF – Failed” and select Fix from the pop up menu.
- Foxit will autotag your document, and run the accessibility check again.
You can now check the tags in the Tags panel by clicking the price tag icon. If the price tag icon is missing, right click the left sidebar and select “Tags” from the menu to add it.
Watch the below video for a demonstration of the above steps:
Document > Primary Language – Failed
The primary language setting of a PDF lets screen readers know how to correctly pronounce the document. If you have failed this check, or want to check the setting:
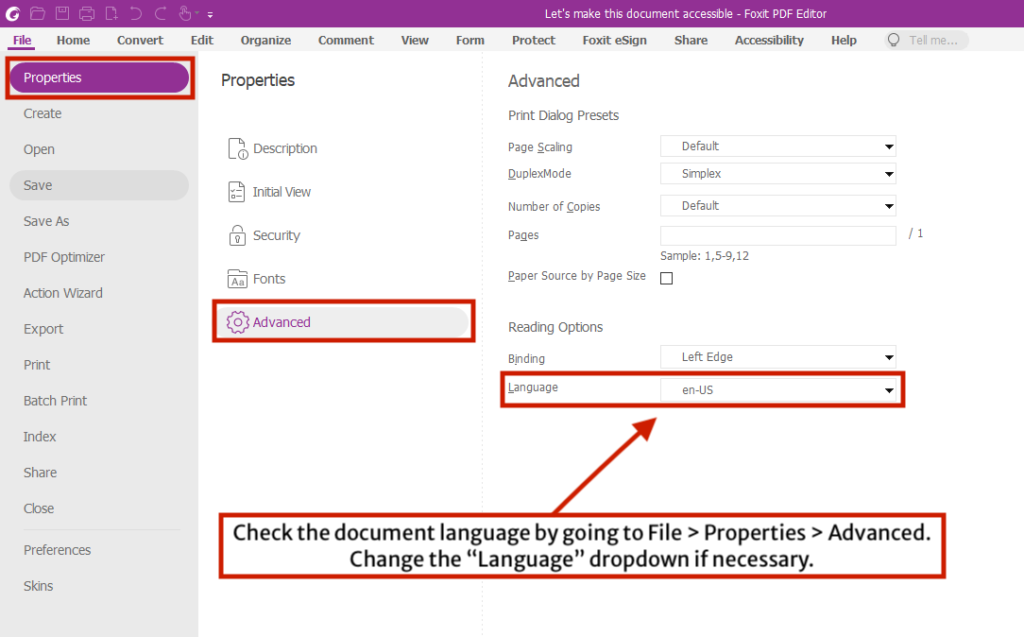
- In Foxit, go to File > Properties > Advanced.
- In the Language dropdown, select the document’s primary language.
- Make sure to Save.
Note that “en-US” is fine to use if the document’s language is English.
Document Title
The document title is specified in the PDF’s properties, and should contain the main title for the document. It’s helpful for users since it provides the title of the document in the browser tab, making it easy to identify.
To add or edit the title in Foxit:
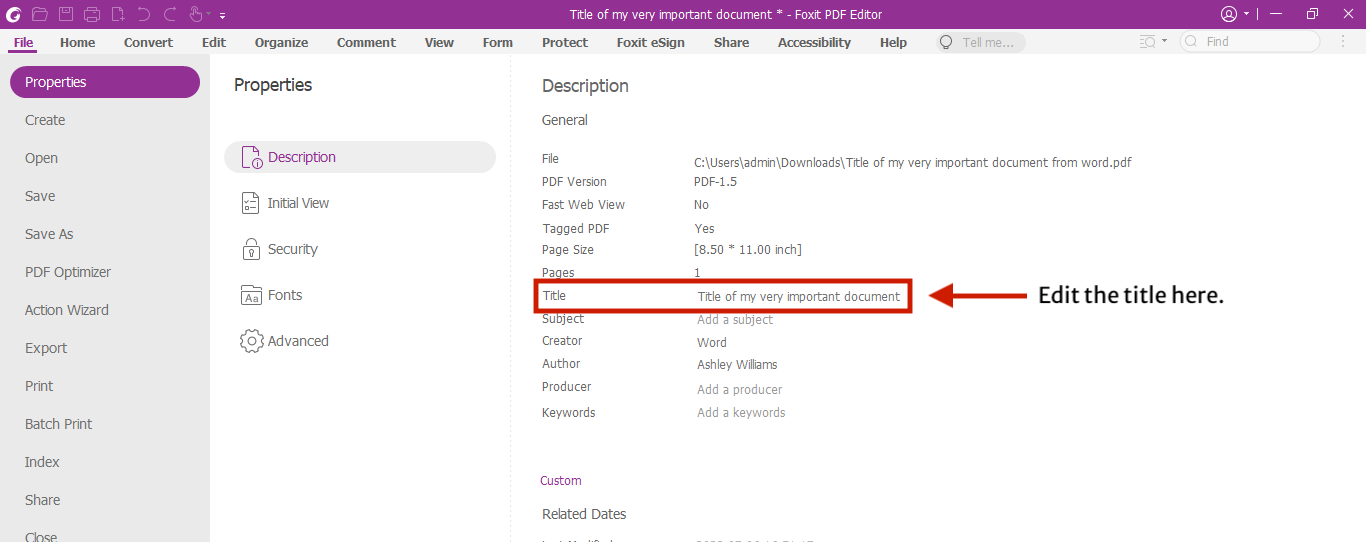
- In Foxit, go to File > Properties
- In the “Description” area on the right, click “Add a title,” and type in the title.
- Save your change.
The title should be relevant and is usually what you would use as the first heading in the document.
Important
Even if the document passes the title check, make sure the document title is useful.
For example, “Untitled” or “Copy of Newsletter 12-7-22” are generic and vague document titles. “Clarke County Extension Newsletter for 12-7-22” is better, since it is specific and lets the user know what the document is about.
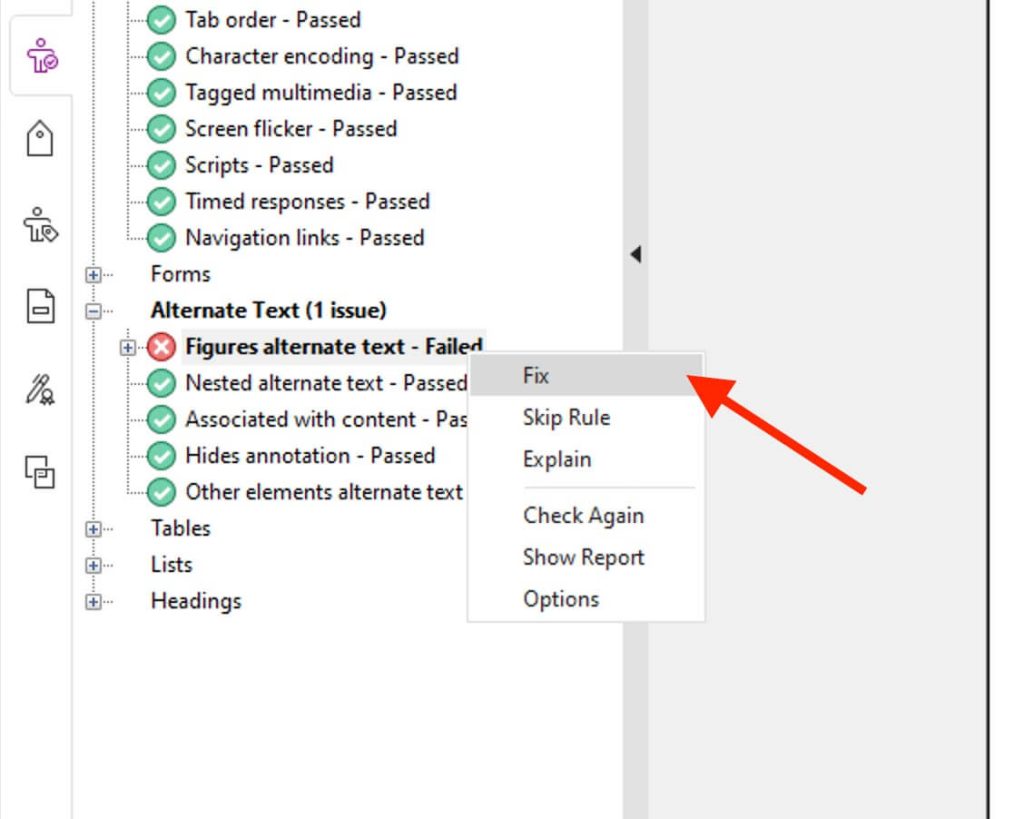
Alternate Text > Figures alternate text – Failed
Images in your document need alternate text – also known as alt text. Alt text is a brief description of the image that is read by assistive technology. Without alt text, images are invisible to screen reader users. To make images in your document accessible:
- In the Accessibility Check pane, expand Alternate Text and expand. Right click Figures alternate text – Failed. Click “Fix.”
- In the “Set Alternative Text” window, set the alt text for the image that is currently highlighted on the screen. If the image is decorative, instead check the “decorative figure” box.
- Repeat for all images. Use the forward and back arrows to navigate to other images in the PDF.

Watch the video below for a demo on adding alt text to figures:
Document > Logical Reading Order – Needs manual check
“Logical Reading Order” is a check that will always need manual review by a person.
The Tags Tree and then the Reading Order tool are the keys to excellent PDF remediation. These tools will help you check the invisible “tags” in your PDF and remediate any issues that the automated tagging process did not catch. Issues may include:
- Tags are out of logical reading order
- Content is not tagged correctly (e.g. a heading is tagged as a paragraph)
- Content is not tagged at all
In the next section, we will use the Tag Tree and Reading Order tools to check for these errors, and ensure our PDF is accessible.
Checking PDF tags
Open the Tags panel in Foxit
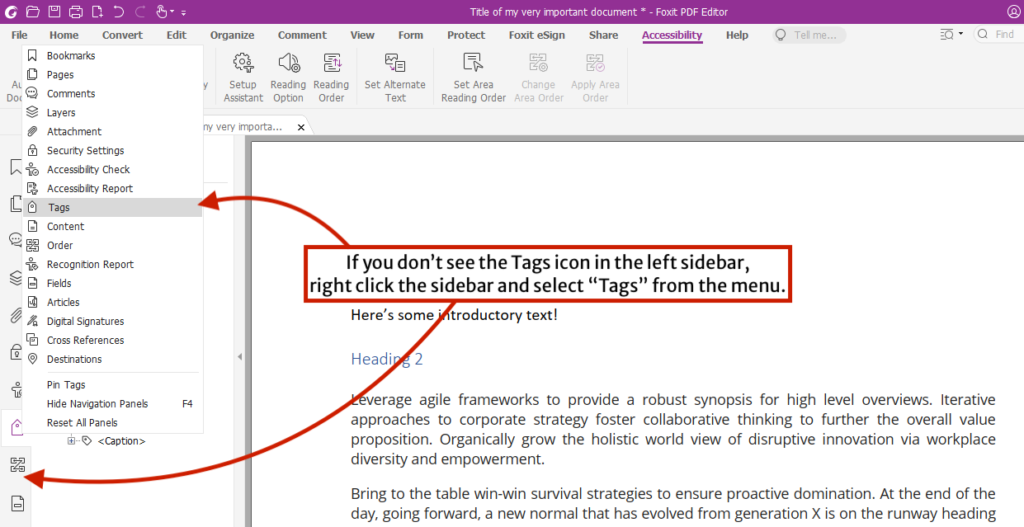
To see a PDF’s tags in Foxit, click the “Tags” icon in the list of icons on the left.
If you don’t see the “Tags” icon, right click the list of icons and select “Tags” from the menu to add it to the left.
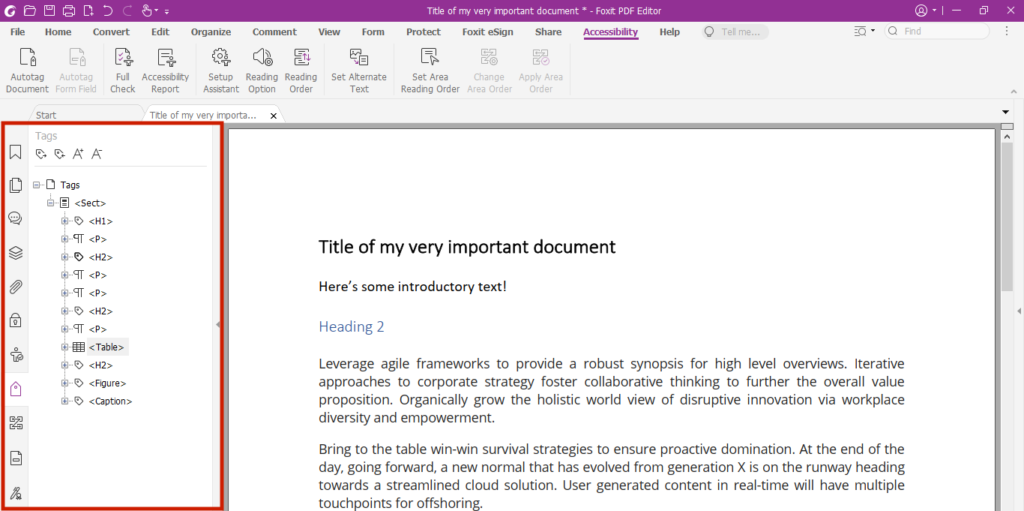
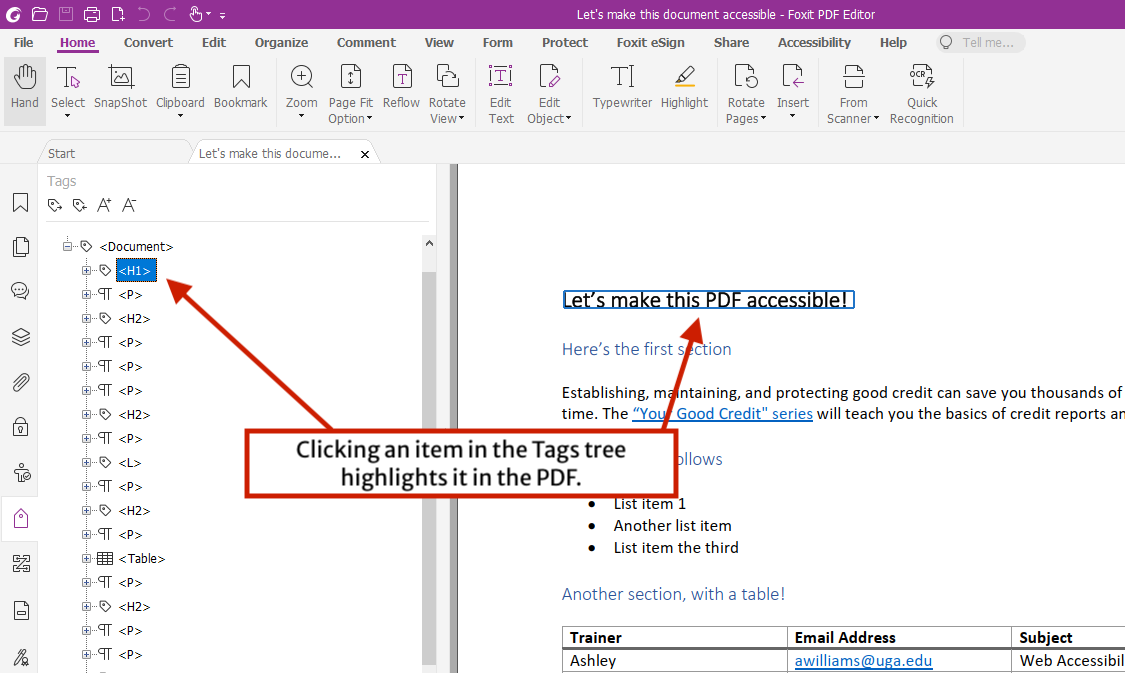
This reveals the Tags tree. There’s usually a <Document> tag at the root of your PDF. Expand this to reveal the rest of the tags. You can expand these to find content and other nested tags. Clicking on each item will also highlight what it represents in the document on the right.
Check tag order
Check the order of the tags in the tag tree. They should be in the same order that the document is logically read in. If a tag is out of order, then you can rearrange it with one of two methods:
- Cut and paste: Right click on a tag that you want to move, and select “Cut” from the menu. Then right click a tag that should come before where the tag will go in the tag tree. Select “Paste“, and the tag will be moved to after the tag you right clicked.
- Drag and drop: It’s also possible to click and drag the tags around the tag tree. Be careful, since it’s possible to drag a tag and placing it inside of another tag.
Watch the video below for step-by-step instructions on reordering tags.
Check tag types
Each PDF tag represents a type of content. E.g., a <P> tag will contain a paragraph, and a <Figure> tag will represent an image, and the <H1>, <H2>, <H3>, etc. tags will represent headings.
If you use the Autotag option in Foxit, some content may be tagged incorrectly.
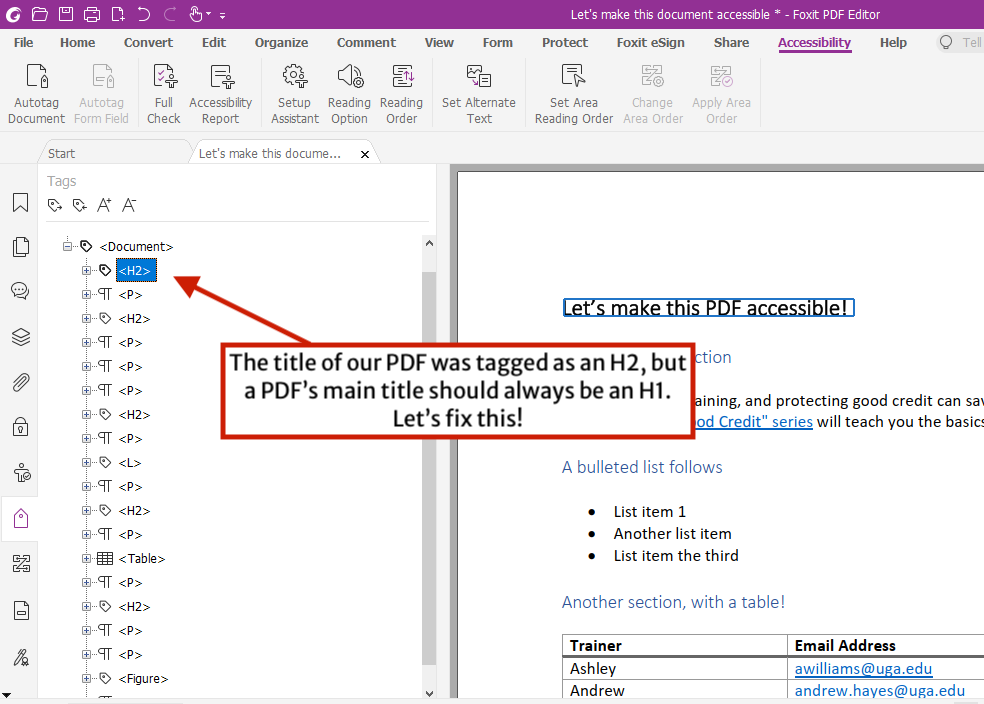
Let’s look at an example below. The first heading of the PDF has been incorrectly tagged as an <H2>. FYI, a document should always contain exactly one Heading 1 for its title!
To fix an incorrect tag, we will need to edit the Object Properties of the tag and set it to the correct tag type. To correct the above example:
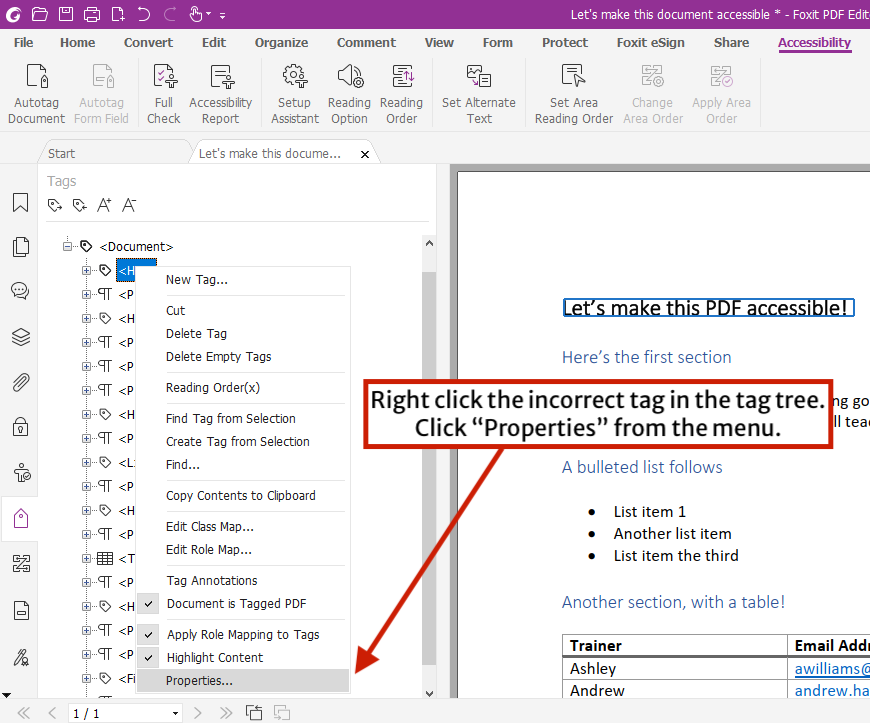
- Right click the incorrect <H2> tag in the document tree, and select “Properties” from the menu.
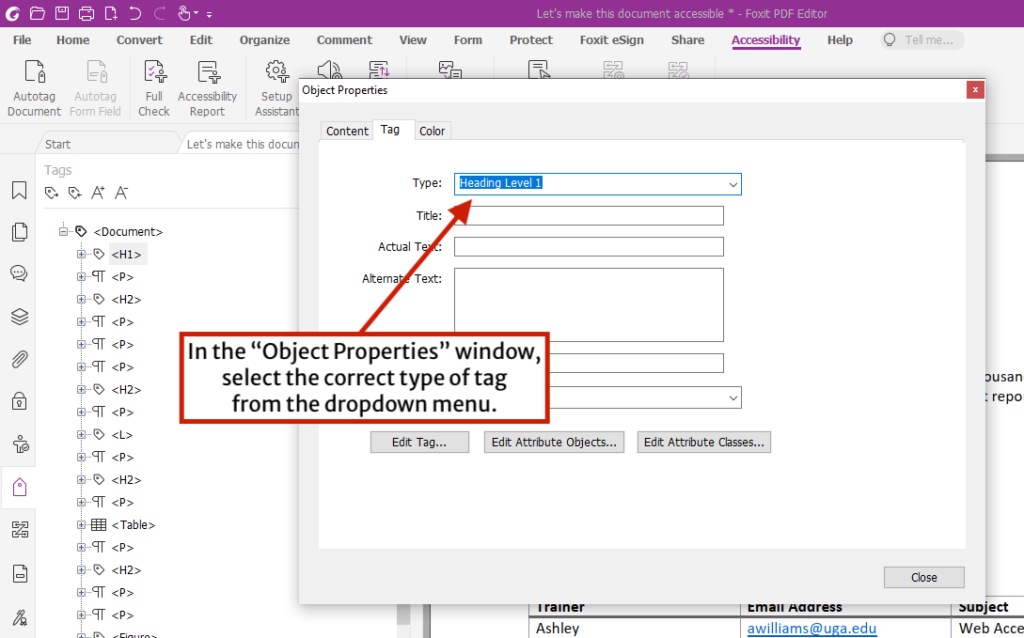
- In the “Object Properties” menu, in the “Type” dropdown menu, select “Heading Level 1“.
- Click “Close” and Save.
Watch the video below for a demonstration on correcting a tag:
Marking empty tags as background/artifacts
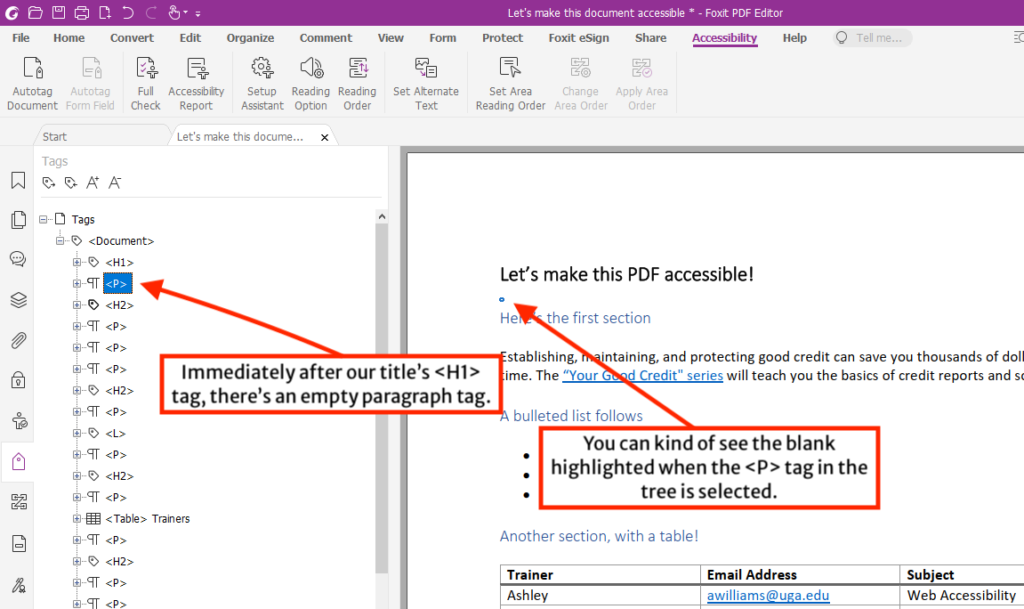
There may be tags in your PDF tree that are empty or contain a single space. This usually happens with <P> tags on blank lines, caused by carriage returns. Tags with blank content can cause confusion for visitors using screen readers.
To fix this, the blank content in the tags will need to be marked as “background/artifact“. Then the remaining empty tags will need to be removed from the tag tree.
To mark blank content as background/artifact:
- Expand the empty tag in the tag tree
- Right click the empty content nested in the tag, and select “Change tag to artifact…” from the menu.
- On the “Create Artifact” window, select “Page” for artifact type (default). Click OK.
- Repeat for all empty tags in the tag tree.
Once you are done, remove the remaining empty tags:
- Right click the “Tags” item at the top of your tag tree, and select “Delete Empty tags” from the menu.
- The empty tags will be removed from the tag tree.
Watch the video below for a demonstration:
Add missing tags
Another issue is when there’s content that’s not tagged at all. Leaving content untagged makes it invisible to the screen reader. For this case, the correct tags need to be added manually to the PDF.
You can add missing tags with the Touch Up Reading Order (TURO) tool. The TURO tool outlines the PDF visually to show how content is ordered and by structure types (tags). It also has tools for adding missing tags.
- With the Tags panel open, go to Accessibility > click Reading Order.
- The “Touch Up Reading Order” window will appear. Notice your document will also now be outlined either by structure type or order. Make sure structure type is selected.
- With structure types highlighted, use your cursor to click and drag a box around the content you want to add a tag for. A blue outline should appear around the content. This part may take a couple of tries to get it to appear.
- Once it’s selected, click the button in the TURO window that represents the type of content you are tagging.
- This adds the tag to your Tags panel. Move it to where it is in the correct reading order.
Watch the video for a demo on adding missing tags:
Combine tags
The automatic tagging process may separate out text into two separate tags, that should be read as one tag. This will cause an unnecessary pause when it is read aloud by the screen reader.
You can combine the content of the tags into one tag, and then remove the leftover empty tags.
- In the Tags panel, find the separated tags that need to be combined.
- Open up the second tag that follows the first. Drag the content from that tag into the first one.
- Repeat the process for any additional lines that may be separated out.
- Once you are done, go to the root parent tag, right click that tag, and select Delete Empty tags. This will remove the leftover empty tags you moved content out of.
Watch the below video for a demo of combining separated content into one tag:
Conclusion
We hope that this guide has left you feeling more confident about making accessible PDFs. If you have questions regarding PDF and document accessibility, please reach out to the Web Team at caesweb@uga.edu.