In this article:
Adding images to a page/post
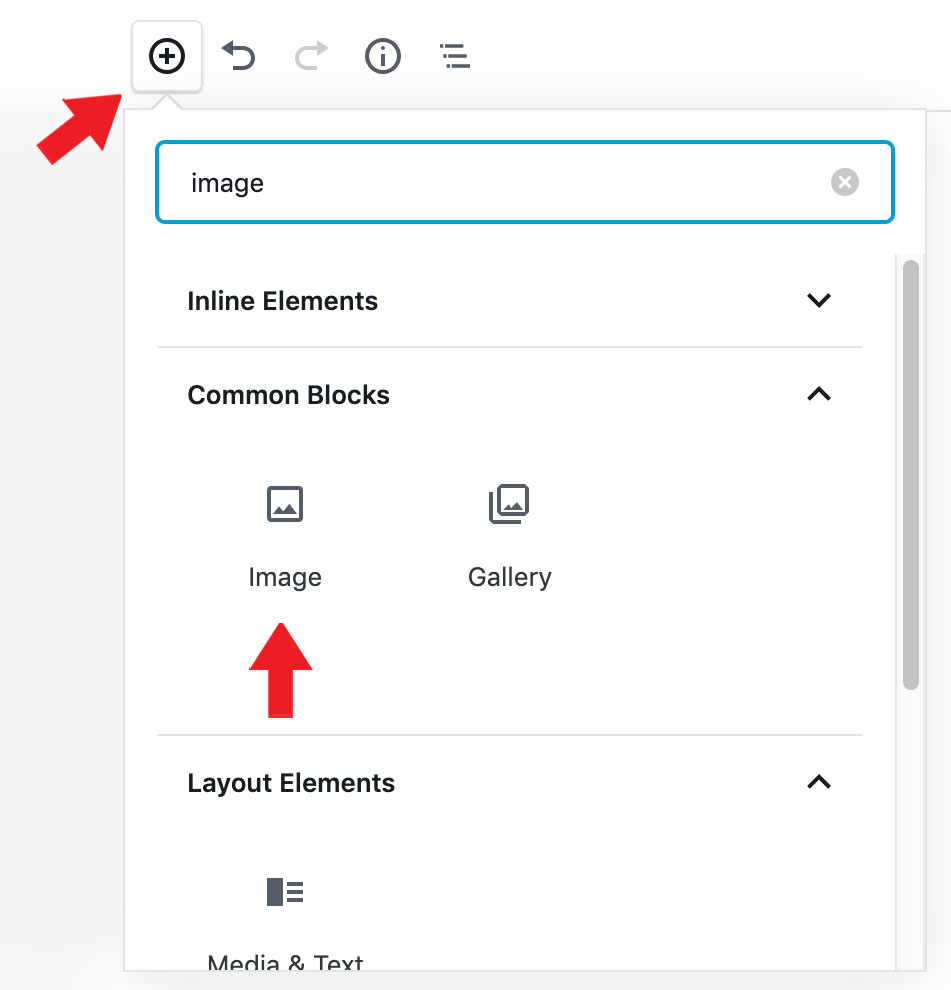
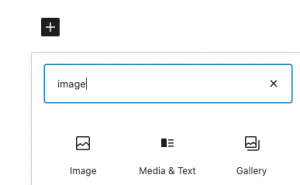
Inserting an image file is really easy. Just browse to the post (or page) that you want to include an image, open it, and add an Image block to the page.
In the Image block options, select Media Library.
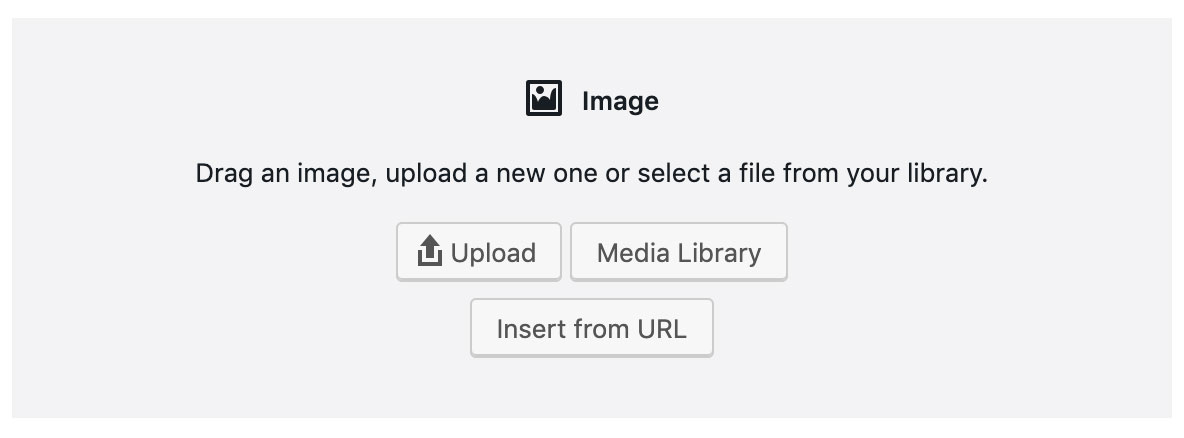
Adding to the media library instead of uploading ensures that you can use the image again in later posts.
This opens the “Select or Upload Media” frame. From here you can upload a new file to your media library or choose something that you already have on hand.
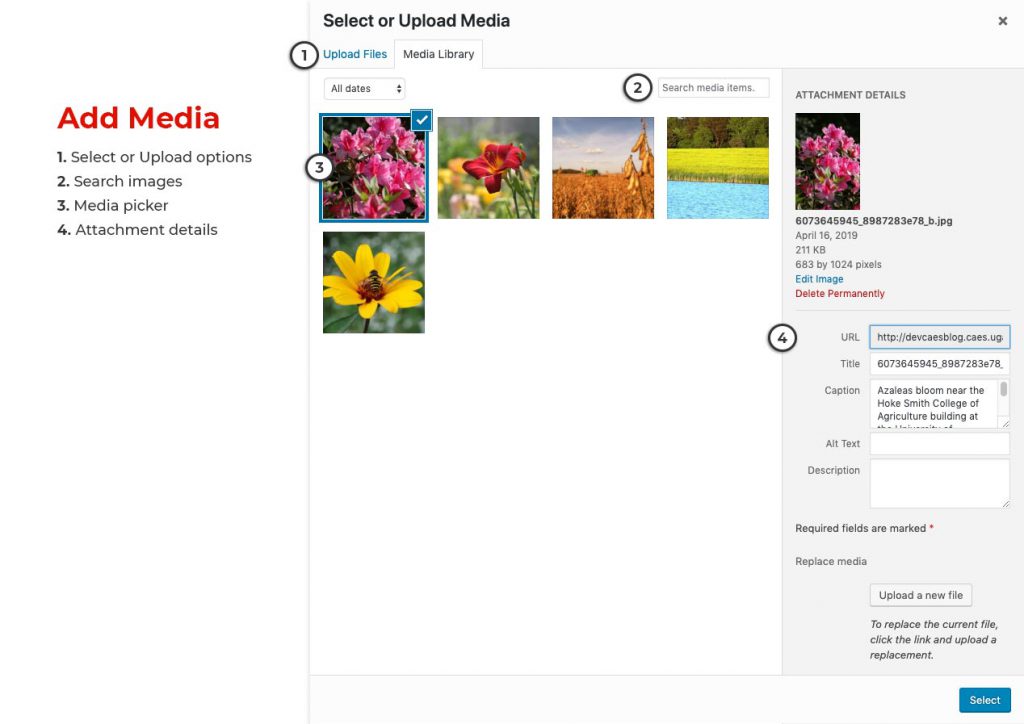
The Select or Upload Media frame has:
- Select or Upload options: you can upload files or browse your media library for existing files.
- Search: if you have a lot of files in your media library, you may need to use the search to narrow down what you see. This searches on the file’s name and other written details, so be sure to update any generic information you may have written on any media (for instance, it will be a lot easier to find an image titled “cat.jpg” than “86456872b.jpg”).
- Media picker: the media picker shows you thumbnails of all the images and other files online in your media library.
- Attachment details: when you select a file, this panel shows you details about the file. You can edit a few things here like title, caption, alt text, and description.
Select the image that you’d like to use from your media picker window and click “Insert.”
Once the image is inserted, click the image to reveal image alignment options. The block’s settings will also appear in the sidebar to the right.
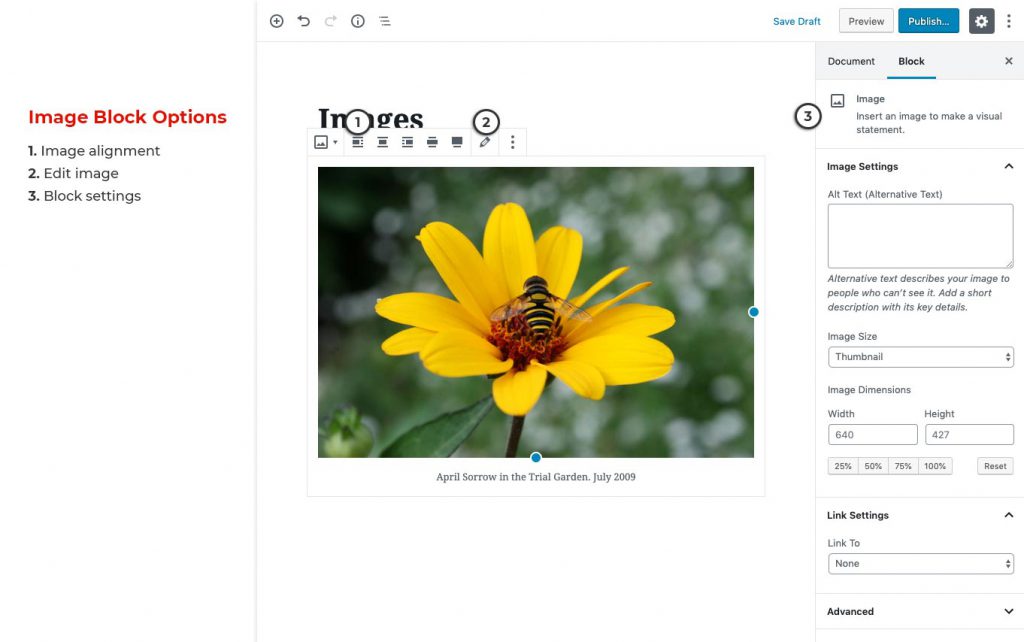
- Image alignment: Align the image to the left, center, and right. On pages that are using a single column template, you can use wide width and full width options to make the image wider than the column, or full width of the page.
- Edit image: Use the pencil icon to go back to the “Select or Upload Media” frame. This options allows for replacing the image.
- Block settings: Set alt text, image size, and dimensions. You can also choose to link the image with Link Settings.
Image gallery
To learn more about creating an image gallery see OIT’s post, WordPress Feature Gallery.
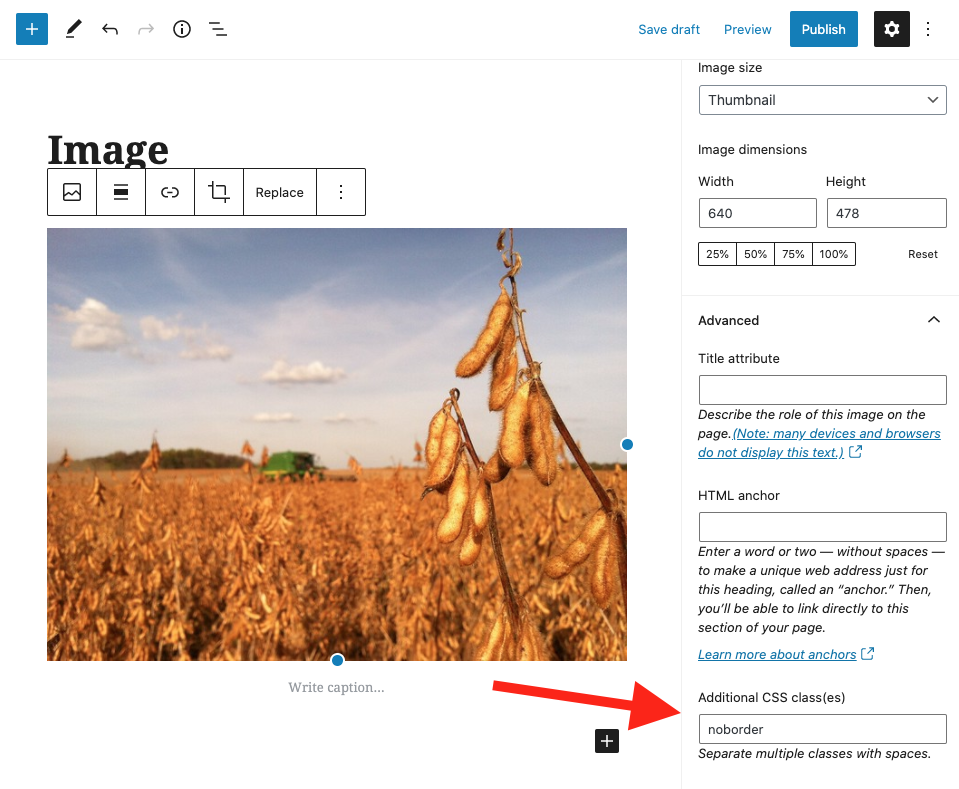
Images Without Borders
WordPress will put a border around your images by default. There are times when your images would look better without a border. How to remove the default border?
First, select your image block. If you’re working on a gallery block, just select one of the images.
Next, look at the “block” settings on right sidebar. You should see an “Advanced” option, though you might need to scroll down. Click to expand this section. Scroll down until you find “Additional CSS class(es).”
In the text box, type in “noborder” without any spaces or quotes. Make sure to save your draft or post, and you’re done.
Repeat for any images you want to be borderless.
What else can you insert?
You can also use the insert media option to upload or link to files like word documents or PDF files. You can also insert media from other websites, like Photobucket, Flickr and Picasa. See WordPress’s documentation on including images from other websites.
Do not use this to upload videos. See Embedding videos for more information on adding video files.
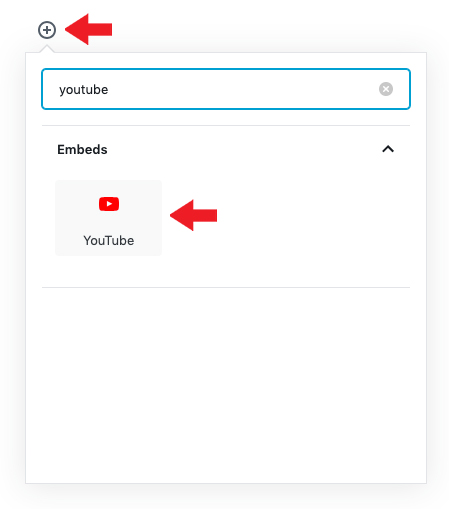
Embedding videos
WordPress makes it easy to embed videos into posts and pages using a YouTube block.
First, browse on YouTube to the video that you want to share. Copy the video’s web address.
Next, create a new Youtube block on your page or post.
Then paste the video’s web address into the “Enter URL to embed here…” field and click the Embed button.
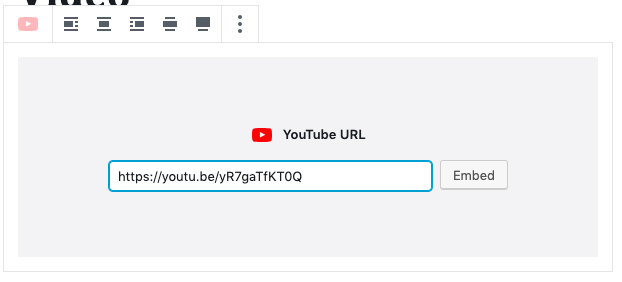
The video will be inserted into the block.

Need to publish a video?
Contact the CAES Office of Marketing and Communications as you begin video production. Our communications group can advise on video production methods and can offer services including hosting, captioning, and marketing.
Please Note: Before you create a YouTube channel, please email OMC. They can help manage the account.
Reviewing existing media
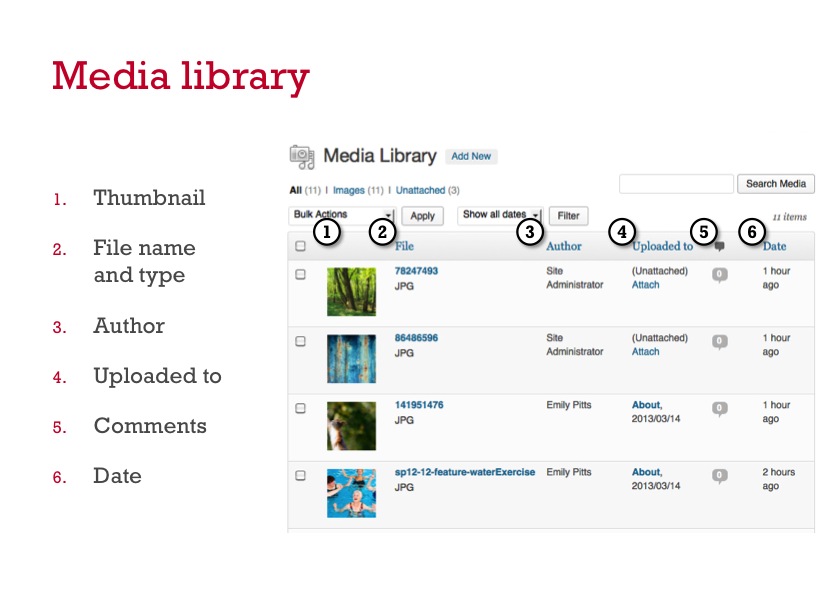
Media library
The Media Library lists all media that you’ve uploaded to your WordPress site. This will typically be image files but can also include PDFs and other sorts of documents. This shows thumbnail, file name and type, author, associated posts (uploaded to), comments and date published.
Edit media
If you want to edit any information about a file or make edits to an image, find the file in your media library and click on the title. This will open up a page to edit basic information about the file.
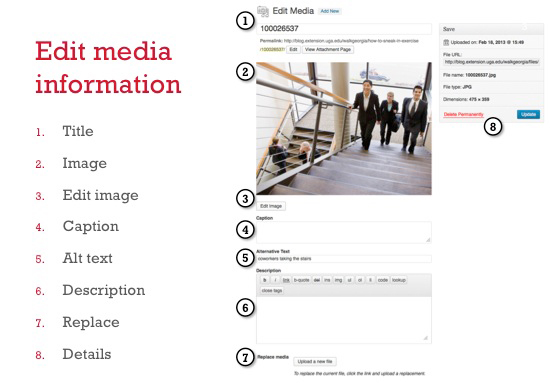
Depending on your media type, you may see these options to edit:
- Title: the title of your file, edit this to be unique and succinct, yet descriptive enough for you to pick it out of a list of files.
- Image: for image files only; this is a preview of your image
- Edit image: for image files only; this links to a tool to Edit Images
- Caption
- Alternative text: for image files only; alt text is mandatory for all images that you upload. This should be a short description of your image that can replace the image in the event that a visitor cannot see or access the image.
- Description
- Replace media: use this option to replace the original file. This is a great way to add updates to an image or document without having to relink it in your posts and pages.
- Details: the upload date, URL, name, and file type for the selected file
Check out WordPress.com’s page on image settings.
Edit an image
In order to edit an image, browse to the image you’d like to edit in your Media Library, select on it, and then choose “Edit Image” under the image preview. WordPress provides some very basic tools to edit your image; these include rotate, flip, scale, crop, and thumbnail settings.
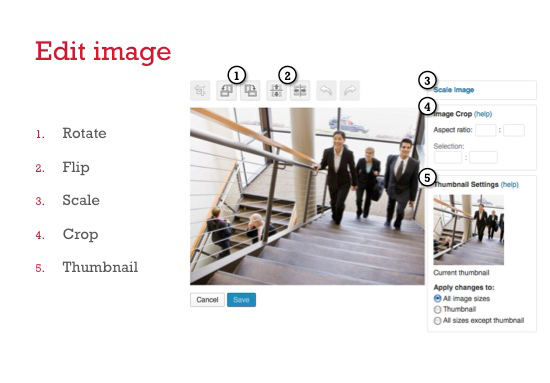
Most of these are pretty easy to do, but cropping might take a little experimentation for you to get it right. If you want to crop an image, click your mouse onto the image and, while keeping the mouse pressed, drag your cursor in any direction to highlight the area you want to keep. Release your mouse and then click on the crop button above the image.
See WordPress.com’s page on image editing.
A word of warning to you though – when you edit an image, it overwrites your existing image, so keep you originals handy! If you don’t like what you’ve done, you can click “cancel” and your changes will not be saved.