A gallery is a great way to showcase multiple images at once. The best part is that when the user clicks on one of the images, it uses a lightbox to display a larger version of the image or video. The lightbox fills the screen and dims out the rest of the webpage, similar to a pop-up window but better. How cool is that? Here’s an example:




I’m sure you are comfortable with how to insert an image on your blog post or page using the Add Media feature. In case you are not, you can learn more from OIT’s WordPress DIY Guide: Working with images and video. Once you’ve learned how to add photos and video, you go a step further by using the gallery feature.
Table of contents
Video Guide
Add a Gallery

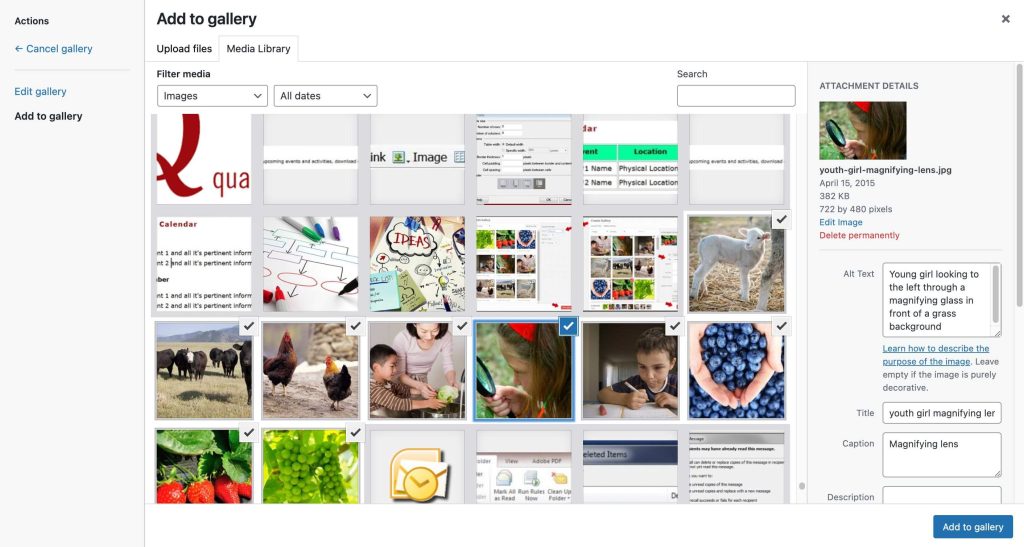
- Insert a Gallery Block. On the gallery block, you can either upload a batch of images with the Upload button or select files from the Media Library (figure 1). In this case, we will select Media Library.
- Choose your images from the “Create Gallery” screen (figure 2).
- You can select images already uploaded to your gallery, or you can upload new ones.
- Make sure that the Title field is filled out with something that makes sense for your image, and not random letters and numbers generated by your camera.
- If you leave Alt Text empty, WordPress will automatically use the image Title for your image’s alt text. Alt text must be provided for accessibility compliance, so make sure either the Title or Alt Text field are filled out with an accurate and concise description of your image.
- Once you are good with your selection of images, click the Create a new gallery button.
- On the next screen, you will be able to drag and drop the images to order them the way you want, pretty neat. Also notice “Caption this image…” written under individual images. This will allow you to type a caption that appears on each image.
- Once you have your images arranged and captioned, click the Insert Gallery button.
Gallery Settings
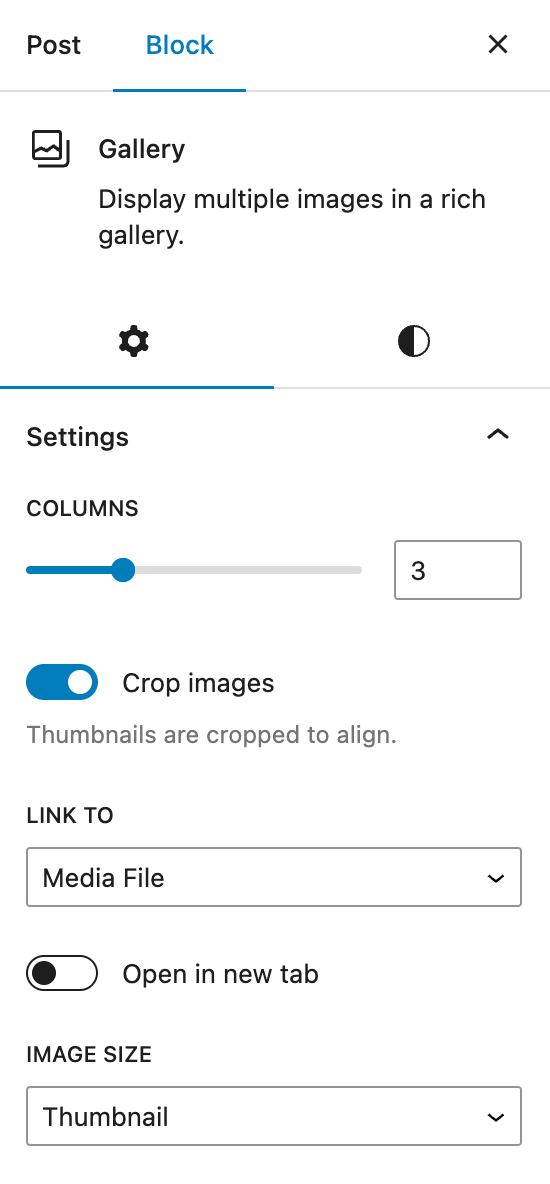
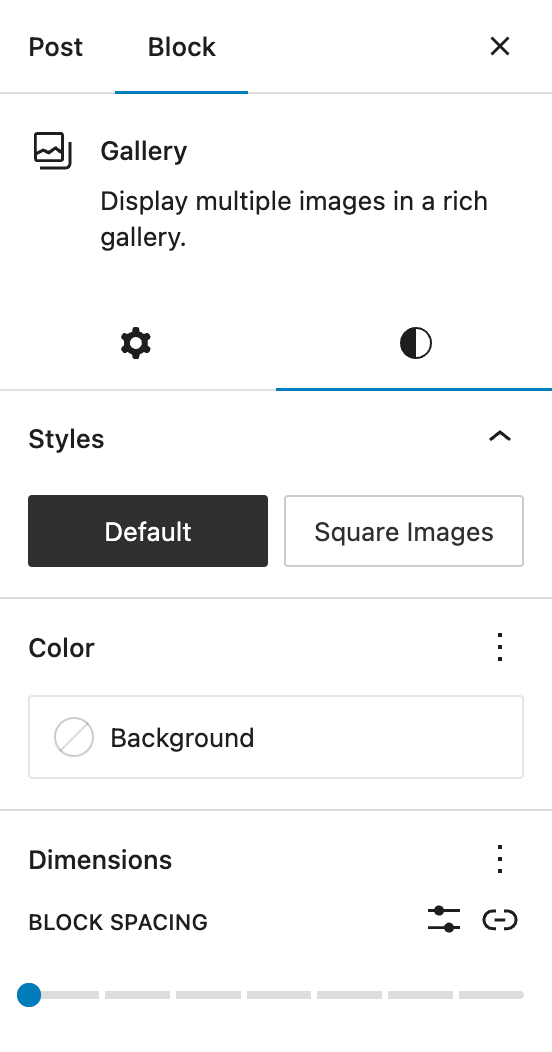
The Gallery Block settings are located on the right side of the page when the gallery block is selected (figure 3 and figure 4). The Gallery Block has two tabs under its settings: Settings and Style.
Settings tab
- Columns: The number of columns your thumbnails will display in. I would suggest between 3-4 columns so it will look good on mobile view.
- Crop Images: When toggled on, the images will crop to align with each other. If turned off, images will maintain their original proportions.
- Link To: Select “Media File” from the dropdown to make images appear in a lightbox overlay when the thumbnails are clicked. Make sure that “Media File” is selected and not “Attachment Page”. “Attachment Page” will take your visitors to a new page each time they select an image, which is not the best experience.
Styles tab
- Styles: Select our custom option for “Square Images” to crop all gallery images as a square.
- Background Color: Select a background color for the gallery block using colors from the theme palette.
- Block Spacing: Use the slider to adjust the amount of space shown between the gallery images.
Need help?
If you have any questions about your CAES or Extension WordPress site, please let us know by contacting the CAES Web Team at caesweb@uga.edu.