Adding new posts to your CAES or Extension blog site keeps your website fresh and your audience informed. This article will guide you on creating a new post in WordPress from start to finish.
Table of Contents
- How do posts appear in a blog?
- ACTIVITY: Make a new post
- Step 1: Make a new post and give it a title
- Step 2: Enter and format the post's text
- Step 3: Enter images into the post
- Step 4: Add excerpt text
- Step 5. Add a featured image
- Step 6. Add categories and tags
- Step 7. Review the post for accessibility best practices
- Step 8. Preview your post
- Step 9. Save, publish or schedule your post
- Step 10. Verify your post is published
- A checklist for creating blog posts
How do posts appear in a blog?
To begin, let’s look at where posts show up in a blog and the different parts of a post.
A post shows up in a few places. It is listed in summary form on your blog home page and on category, tag, and search result pages.
The summary of your post shows the post’s date, title, author information, featured image, and excerpt text. It also includes a link to the post (in the title) and a link to associated categories (figure 1).
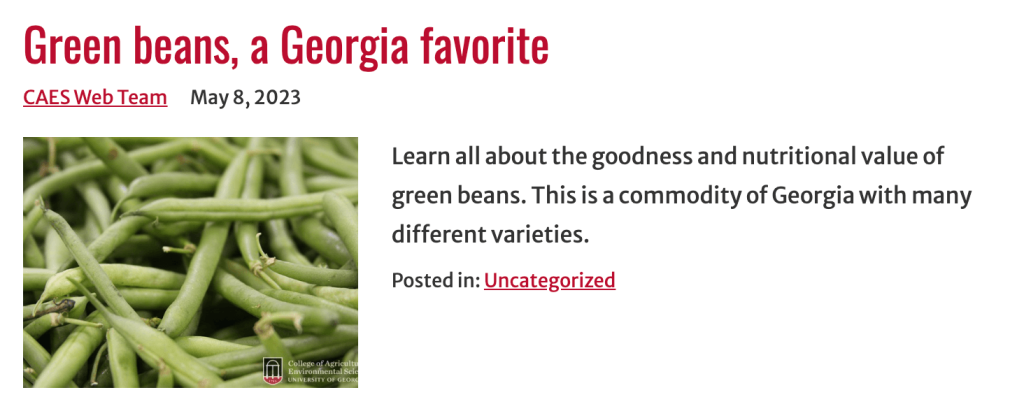
The excerpt text is automatically taken from the first few lines of your blog post’s text. If you’d like to have more control over this, you can enter a summary for your post as “excerpt text”.
The featured image is not automatically taken from the blog post’s text. If you would like an image with the summary, you will need to set a featured image for the post.
The full-text version of the post shows the post’s date, title, author information, all of the text, and any images included in that text. It also includes all of the categories and tags associated with the post.
You may sometimes see comments at the bottom of a post. For this demo we will not be looking at comments.
Now that we’ve seen how posts are displayed in a blog, let’s go to WordPress and login.
ACTIVITY: Make a new post
If you are following along with this article, now is a good time to login to your own WordPress account.
Step 1: Make a new post and give it a title
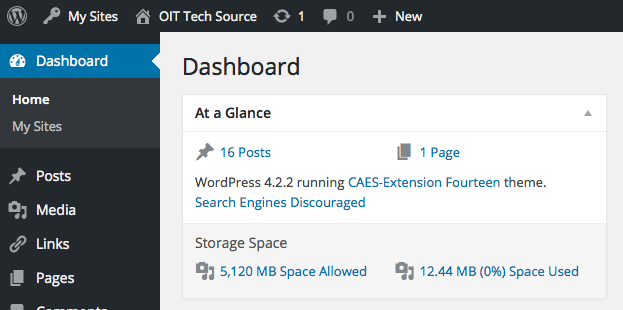
When you login WordPress, you will be taken to your blog’s dashboard. To make a new post, click on the “+ New” button in the tool bar and select “post” (figure 2).
This opens up a blank post page (figure 3).

Enter the title of your post at the top of the page (figure 4). Now click the “Save draft” link in the upper right corner of the page. This generates a permalink. If you’d like to shorten the link to this post, edit the permalink in the post settings.

Step 2: Enter and format the post’s text
Enter the text of your post and format your text. You can start typing in the first empty block on the page.
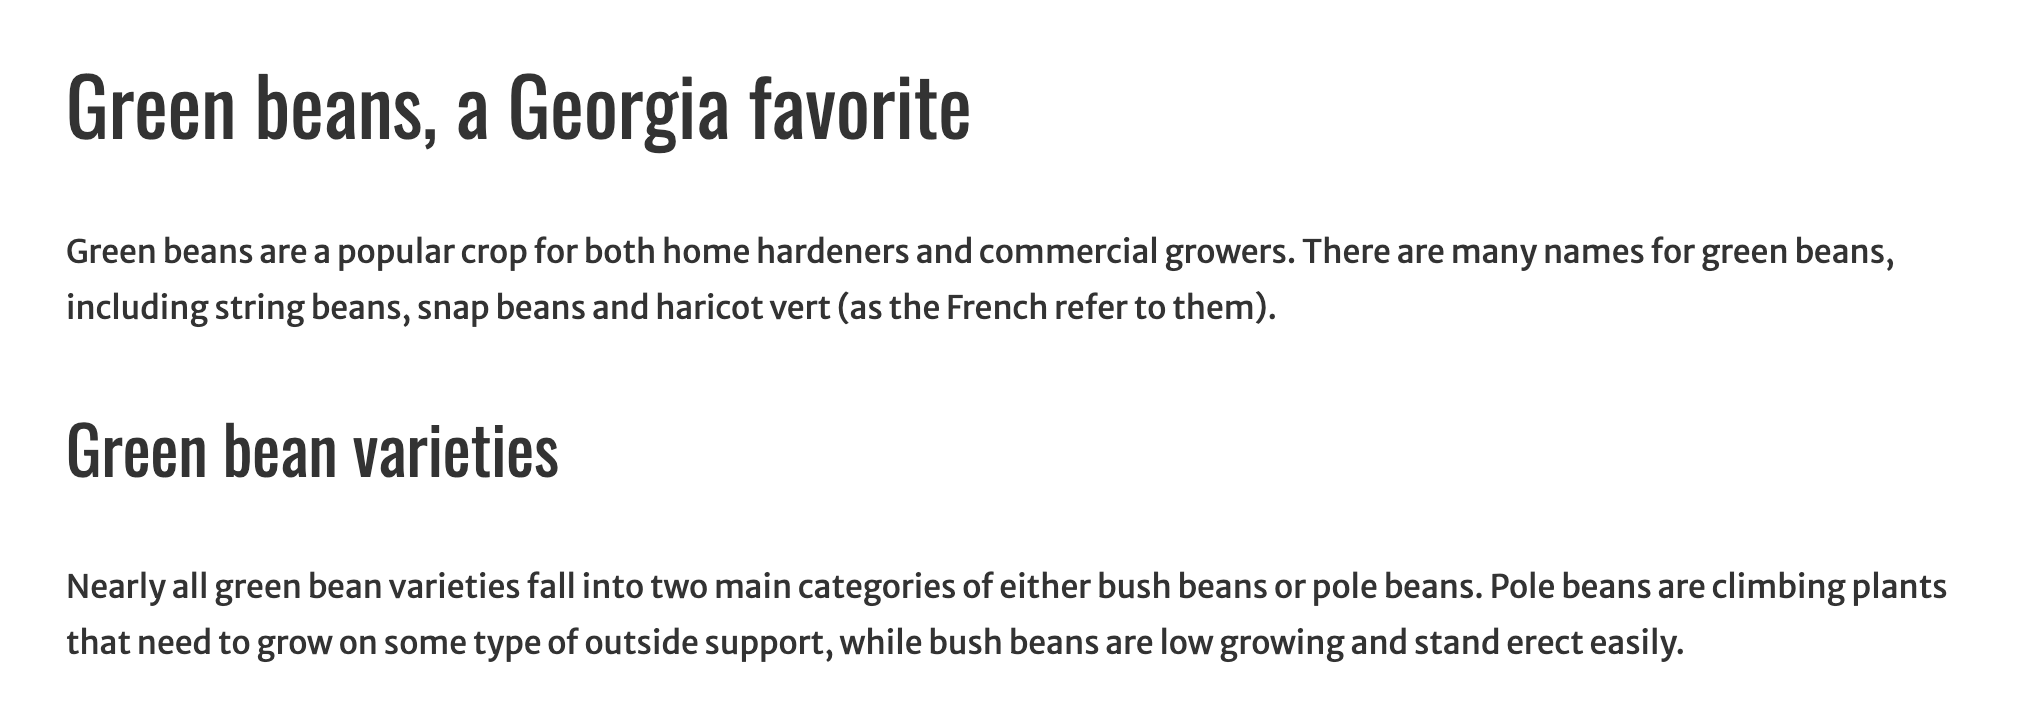
Add headings to offset sections of your post and bullets to help people scan lists of information (figure 5). You can do this by inserting new heading blocks with the Add Block button, or switching existing paragraph blocks to heading blocks.
Step 3: Enter images into the post
Place a photo in your text by adding in an Image Block, and then selecting either upload new image or selecting one from the media gallery. This takes you through the steps for adding an image (figure 6).
Make sure your images include alt text! Alt text is a short description of the image that is read to site visitors who are using assistive technologies, like screen readers. Learn more about how to add alt text in our Accessibility Tips for WordPress Content Managers article.
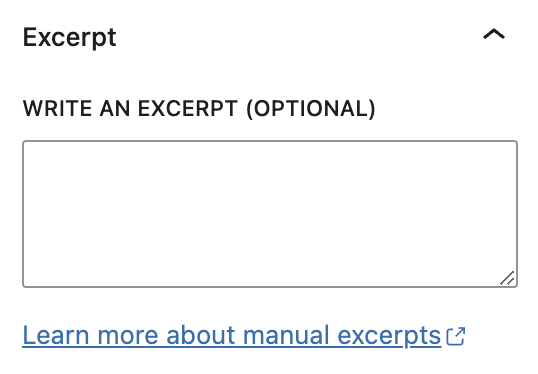
Step 4: Add excerpt text
Look in the post settings tab on the right and you’ll see an “Excerpt” section (figure 7). If you would like to add specific summary for this blog, enter it here. This text will show up in the summary view of your blog posts, as well as on social media when you share the post link. If you don’t enter an excerpt, the summary view will just include the first section of your post.
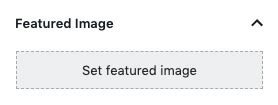
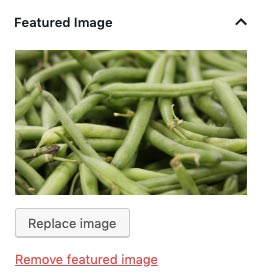
Step 5. Add a featured image
The featured image is what shows with your post’s summary (shown in Figure 1), and on social media when you share the post link.
Look in the post settings tab on the right and you’ll see an “Featured Image” section (figure 8). If you don’t have a featured image selected yet, click on “set featured image” to select one from your image gallery or to upload it from your computer (figure 9).
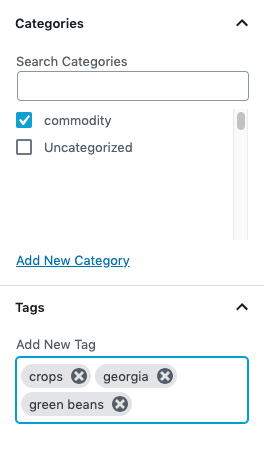
Step 6. Add categories and tags
Finally, if you are categorizing your posts, be sure to choose the appropriate categories and tags.
Categories and tags are located in the post settings on the right. If you don’t see a category or tag that you’d like to use, you can add them from here.
For this example, I’m going to choose my custom category “commodity” and include a few specific items under tags, like “crops”, “Georgia,” and “green beans” (figure 10).
Step 7. Review the post for accessibility best practices
Content in your post should be accessible to users with disabilities. Always review your post to ensure it is using accessibility best practices. Some best practices are making sure your images have alt text, your links are descriptive, and that your headings are in order.
To learn more about accessibility best practices, read our five tips for more accessible web pages article.
Step 8. Preview your post
Now is a good time to preview your post to make sure the text is showing up as you’ve entered it. Click on the “Preview” link in the upper right corner of the editor screen. This will open the post preview in a new window so you can review how it will look when it’s published.
Take a minute to read through your post again. Check for spelling, grammatical errors or other typos. Are your images all in place?
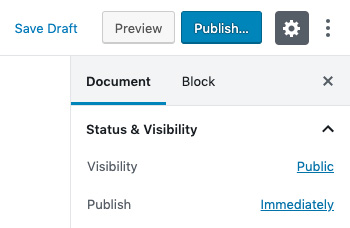
Step 9. Save, publish or schedule your post
Now, let’s look at the publish options for this post (figure 11). You can save it as a draft if you aren’t ready to publish it and want to work on it later. You can publish it if you are ready for the post to go live immediately. You can schedule it if you want it to publish at a later date and you are done editing it.
Step 10. Verify your post is published
If you have published your post, this is the final step. Go to your blog’s home page and make sure that your new post shows at the top of the list. If you’ve added excerpt text and a featured image, check that those are showing correctly.
If you have scheduled a post to release at a later date, check back on that date to be sure your post has been published.
A checklist for creating blog posts
That’s it! You have now created a post from start to finish. Refer to these 10 steps the next time you post an article to your blog.
- Make a new post and give it a title.
- Enter and format the post’s text.
- Enter images into the post.
- Add excerpt text.
- Add a featured image.
- Add categories and tags.
- Review the post for accessibility best practices.
- Preview your post.
- Save, publish or schedule your post.
- Verify your post is published.
Check the OIT’s WordPress posts again for more WordPress tips.