On April 22nd we’re launching a re-organization of the Cooperative Extension section of our Intranet. CAES Intranet content managers will be able to access and edit their content again beginning on Friday, April 23.
With editing access opening up later this week, now is a great time for intranet content managers to review the editing tips below.
Use headings to break up content
Use headings to break up and group information on your page. Think of headings as a way to outline your page’s content that helps users quickly find the information they’re looking for. This is especially helpful with lengthy pages, though you should strive to be as concise as possible (more on that later).
Headings can be inserted using the editor’s Heading block.
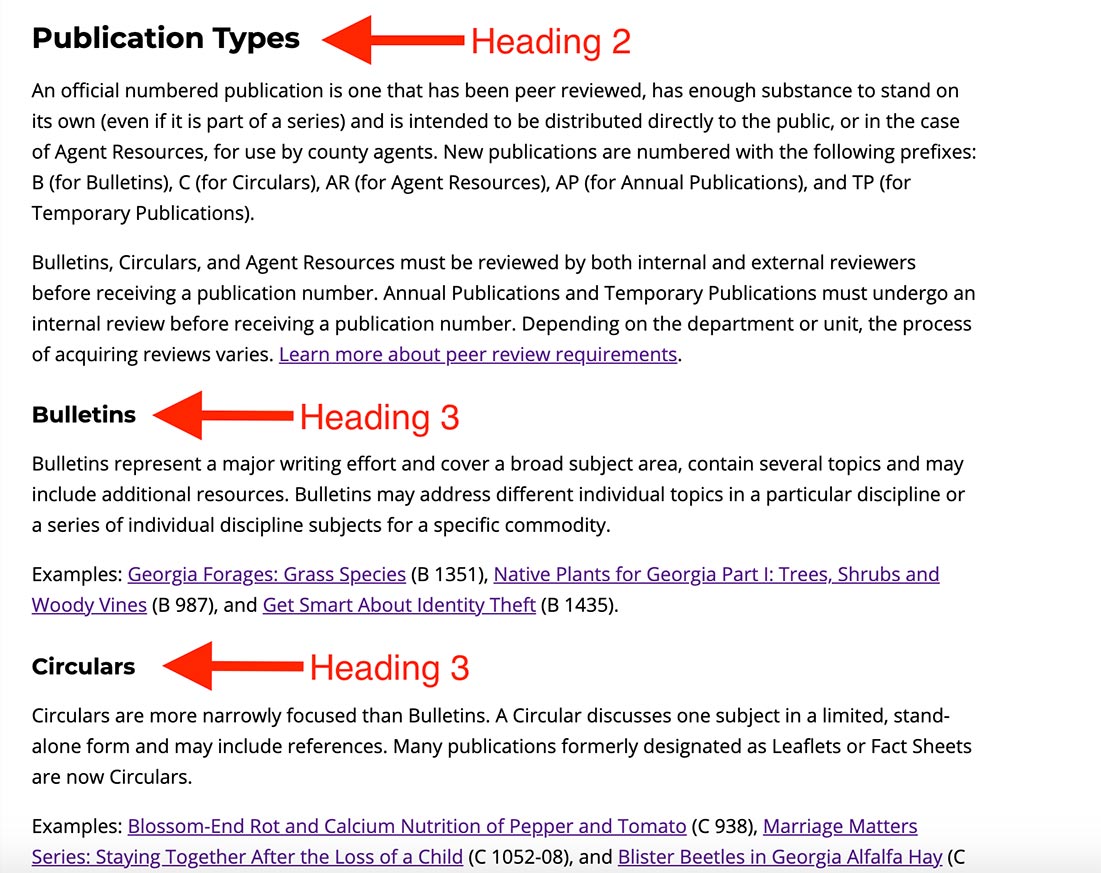
When using heading styles:
- Always start new sections on a page with a Heading 2 style. There’s no need to use a Heading 1 since it’s already used as the title of the page.
- Use headings in order. Use Heading 2 for main sections of your page and Heading 3 (and so forth) for sub-points under your main sections.
- Never use a heading style on entire paragraphs or bodies of text! Headings are meant to help readers find the beginning of a section of your page content, and they are not meant for emphasis. Using heading styles on paragraphs is also an accessibility issue.
Use columns to arrange content
With the columns block, it’s easy to place content side-by-side on an Intranet page.
For example, let’s say that you have a really long topic covered on one page. You decide to add jump links at the top of the page that jumps visitors down to different sections. However, the list of jump links makes your page even longer!
To fix this you use a column block. You set up two side-by-side columns: the left column is 66% of the page’s width, and the right column is 33%. Your introductory text goes in the left column, while your navigational jump links go in the right.
Keep in mind that columns stack on top of each other on mobile devices. If you’re doing something like described above, you’ll want to make sure that not all of your page’s content is in that left-hand column. That would end up putting your navigation at the very bottom of the page when viewed on a phone! Instead, continue the rest of your page’s content after the intro text and navigation items in the editing area beneath the column blocks. (When in doubt, use the preview option to check your work.)
To learn more about the columns block, read our columns block article, or WordPress.org’s article on columns.

Linking files, links to other websites, and email links
File links
Use the File block when linking to a document that you’ve uploaded to WordPress’ media library. Instructions on how to use the File block can be found here: Adding documents with a file block.
Links to other websites
When linking to external websites outside of intranet.caes.uga.edu, simply copy and paste the website’s address into the link URL field when adding a link to text or buttons. Make sure the full address is pasted in, including the https:// part at the beginning.
Email links
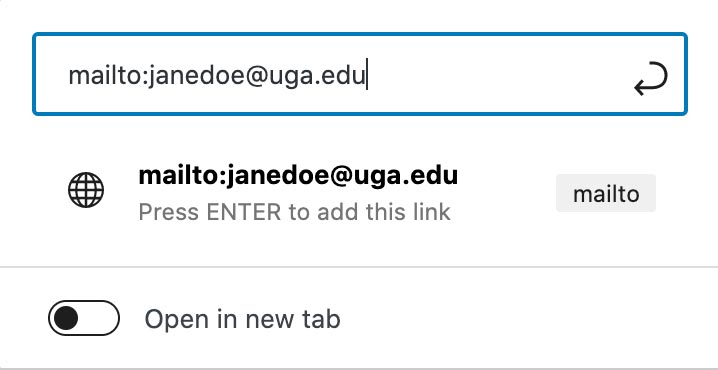
When adding an email link to a text or button, you must include this text at the beginning: mailto:
Including the “mailto:” part means your email link will open the visitor’s email client with a draft set to send to the email address.
For example, if linking janedoe@uga.edu, your link address would be:
mailto:janedoe@uga.edu
Use buttons effectively
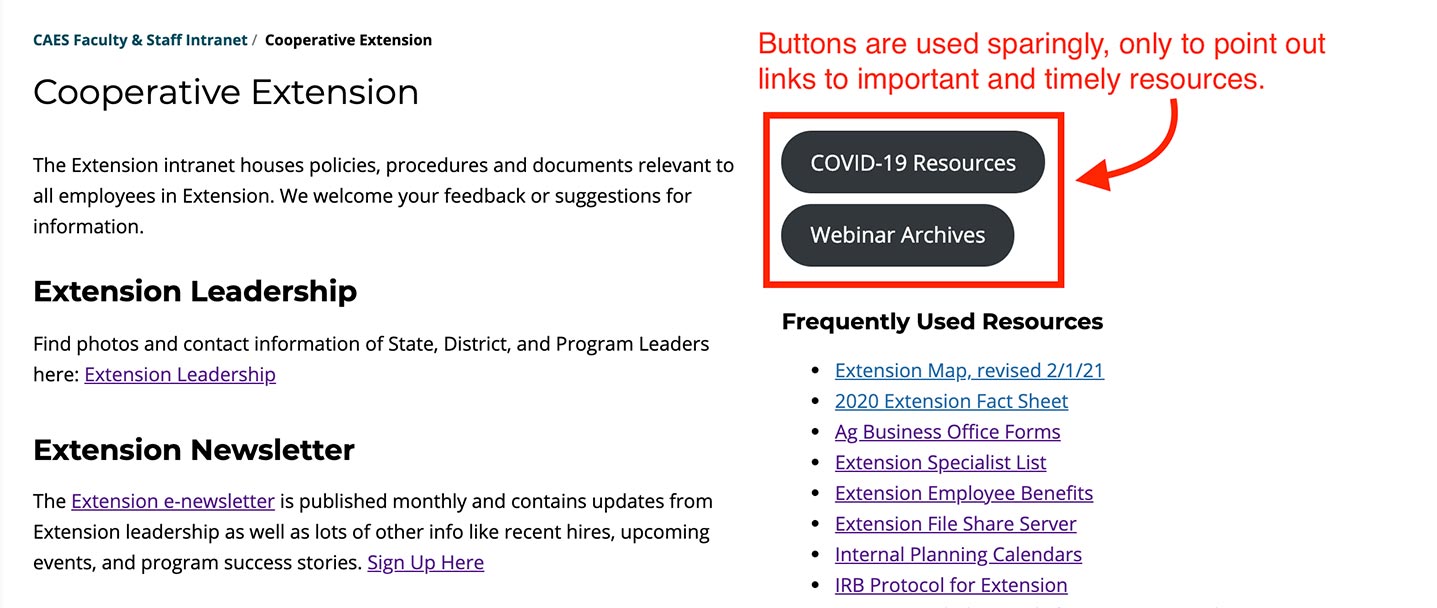
With the WordPress editor you can easily add buttons to a page using the button block. Adding a button is as straightforward as adding any other block, but if you need help, please see WordPress.org’s button block article.
Only use buttons for the most important “calls to action” on your page. This means using them for links you really want people to visit, if nothing else, on the page. The more buttons you use per page, the less effective they are at telling the visitor, “I’m important, please click me!”
Write pages concisely and with clarity
Content on the CAES Intranet can get lengthy and technical since it covers documentation, policies, procedures, and forms.
With that said, it’s important to edit your content to be concise and clear whenever possible. The goal of any web page (even intranet web page) is to provide valuable information to your audience that’s easy to scan and understand.
When writing for the web, remember to:
- Be concise. Remember that people scan web pages rather than read them. Be concise by cutting out any unnecessary details or repetition.
- Be clear. Your audience should be able to easily understand what a page is about as soon as they land on it. Headings should clearly communicate what lies under them. Link text should clearly communicate what it leads to. Use active voice vs. passive voice.
Have questions or need help?
Finally, if you have any questions about the above tips or editing web pages on the CAES Intranet in general, please contact the OIT Web Team at caesweb@uga.edu.