This article contains instructions for creating links to PDF documents from WordPress websites and is intended for CAES and Extension content managers.
We highly recommend accessibility materials produced by WebAIM: PDF Accessibility with Acrobat, PDF Accessibility with FoxitPro, and the Accessible Documents Course.
In this article:
Web pages vs. PDFs
This article contains instructions for linking such PDF documents. But before describing that process, we would like you to think about another option: writing your announcement, update, or newsletter directly on your website.
You likely won’t be able to exactly reproduce the PDF’s pretty layout, and there might be a learning curve as you learn new techniques of laying out your information.
But the benefits usually outweigh those concerns:
- It’s faster to create pages.
- Google will find the pages more easily.
- Web pages adjust to different devices and screen sizes, unlike PDFs.
- You won’t need to learn about PDF accessibility, which can be very complicated.
- Mobile users will appreciate not having to download a PDF on their phone.
Contact the CAES Web Team (caesweb@uga.edu) if you would like to create web pages instead of PDFs, but need pointers on creating columns, positioning images, or if you have other layout questions.
Creating PDF links within a paragraph or list
The instructions below assume that you have made an accessible PDF according to Section 508 guidelines. Take the self-paced WebAIM PDF accessibility course to learn more, or you can create web pages.
It’s counterintuitive, but adding a “simple” link within a list or a paragraph is slightly more complicated than it seems. Instructions follow below.
Step One.
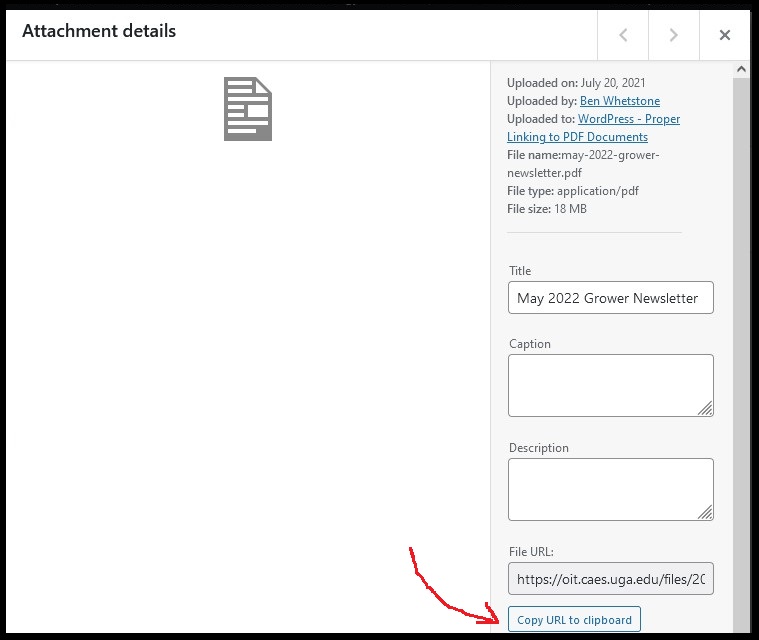
Navigate to the WordPress Media Library. If you have not done so already, upload your PDF. Then click on the document to view its Attachment Details. (See Figure 1.) Copy the File URL to your computer’s clipboard. (See Figure 2.)

Step Two.
Navigate to the page you want to edit. Either type a new paragraph or list or find the existing paragraph or list where your link will go. Highlight the text that you want to turn into a link, click on the “Create Link” icon, and paste in the URL you copied earlier. (See Figure 3.)
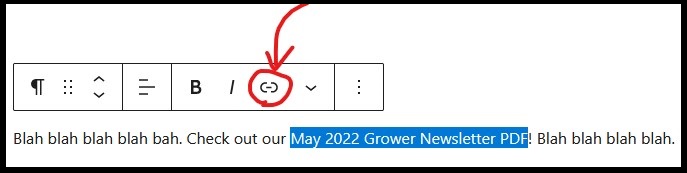
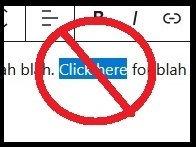
Avoid creating “Click here” links. (See Figure 4.) Users reading your site with a screen reader will have a hard time using these links since the link text does not describe what the user will find. Instead of “Click here” you could write, “Check out our May 2022 Grower Newsletter PDF,” with “May 2022 Grower Newsletter PDF” as the link text.
A common question is whether it’s possible to force a PDF to open within the user’s browser rather than downloading and then opening with another program like Adobe Reader. Unfortunately, there is no way to do this. The user’s browser and operating system will determine exactly what happens after the user clicks on your PDF link.
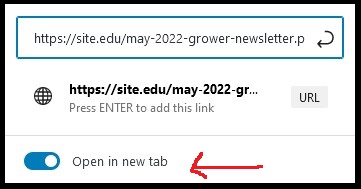
You can specify that a document opens in a new tab by clicking the “Open in a new tab” option when creating the link, (see Figure 5), though this does not fully guarantee that the document will actually open in a new tab if the user’s browser does not support that option.
Using the built-in WordPress File block
The instructions below assume that you have made an accessible PDF according to Section 508 guidelines. Take the self-paced WebAIM PDF accessibility course to learn more, or you can create web pages.
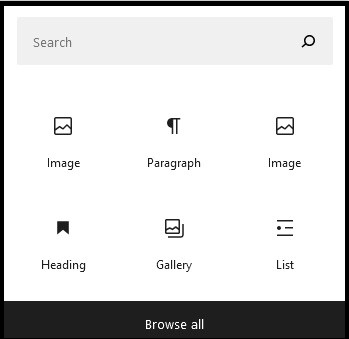
The easiest way to link to a PDF in WordPress is to use its built-in File block. This is a good option when you want to display the link in “button” format or when you’d like the PDF to be embedded (displayed) within the page.
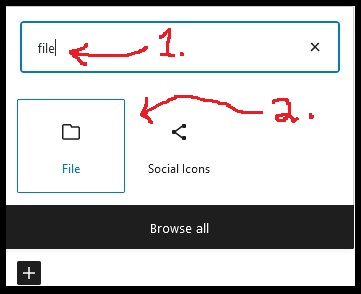
Step One.
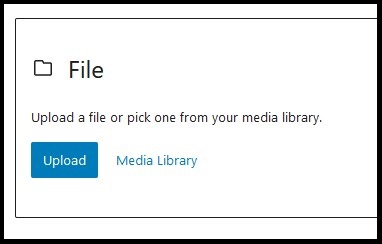
Add a new File block to your page by searching for and selecting the “File” block. (See Figures 6 and 7.) Once the block has been added to the page, either upload your PDF or select it from the Media Library. (See Figure 8.)
Step Two.
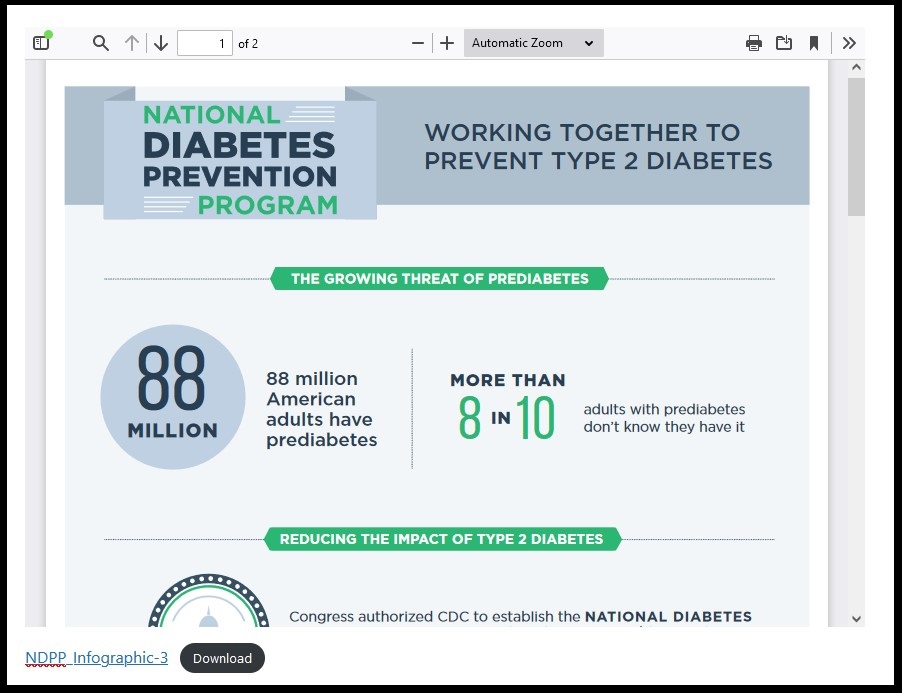
Once you’ve selected your PDF, WordPress will automatically include an “embedded” version of the PDF on the page. (See Figure 9.) This is often very handy! Users can view and interact with your PDF without leaving the page.
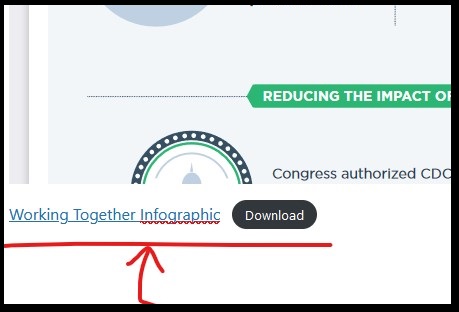
Under the PDF, there will also be a text link and a download button. Be aware that users on Android mobile devices may not see the embedded PDF at all! They might only see this link and button. If needed, re-type the text link so that it’s something easily understandable and human friendly. No dashes, special characters, random numbers, etc. (See Figure 10.)
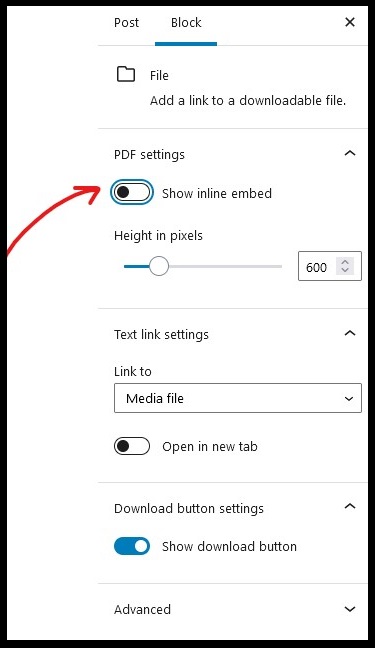
Sometimes you might want to hide the PDF on purpose and only display a link and button. To do this, look for the “Show inline embed” option on the right hand sidebar, under the Block tab. (See Figure 11.)
There are other options you can explore as well, including changing the size of the embedded view, and more.
Step Three.
Now you are ready to publish your changes. Always double-check on the public website to make sure the link and embedded PDF works.
And check from your phone, too!
And finally,
If you have any questions at all, don’t hesitate to contact the CAES Web Team at caesweb@uga.edu.