What is DocuSign?
DocuSign helps get a document electronically signed. It’s safe — everything is encrypted — and it’s easy to use.
How do I get an account?
Submit a ticket for the OIT Service Desk at: https://uga.teamdynamix.com/TDClient/2060/Portal/Requests/ServiceDet?ID=42725
Getting signatures on a document
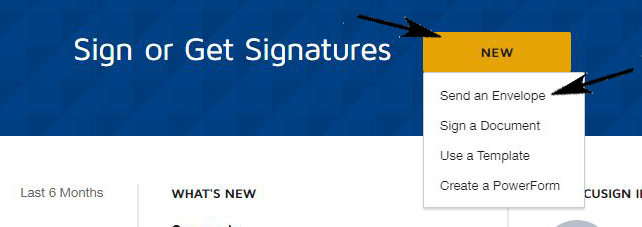
Step 1: Create an envelope
Definition: An envelope is a document you need to get signed.
Once you are logged in, click on the New button and then on “Send an envelope.” This will allow you to upload a document and choose the person or persons it’ll be sent to.
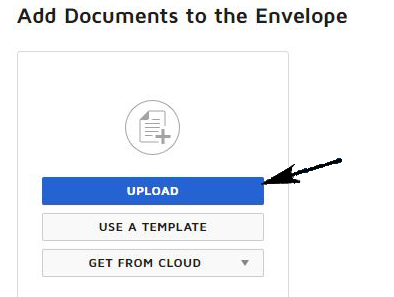
In the upper left-hand corner of the resulting screen click Upload to upload the document you’d like to have signed.
Step 2: Add recipients
Definition: A recipient is the person who needs to sign.
Next, add recipients to your envelope.
- Type the name and email of each signer. The icon to the right, beside the name, is a list of your previous contacts. Anyone you’ve sent a document to is automatically added to your contact list.
- Optional: Click the “Set Signing order” check box if the document needs to be signed in a particular order. If who signs first, second, etc., does not matter, leave this unchecked.
- Optional: Add the name and e-mail address of those who will not be signing, but should receive a copy (I.e. principal investigators). In order to set this, choose “Needs to Sign” and choose “Receives a Copy” from the dropdown.
- Optional: Under the “More” tab next to “Needs to Sign”, you can add a private message to each signatory/recipient.
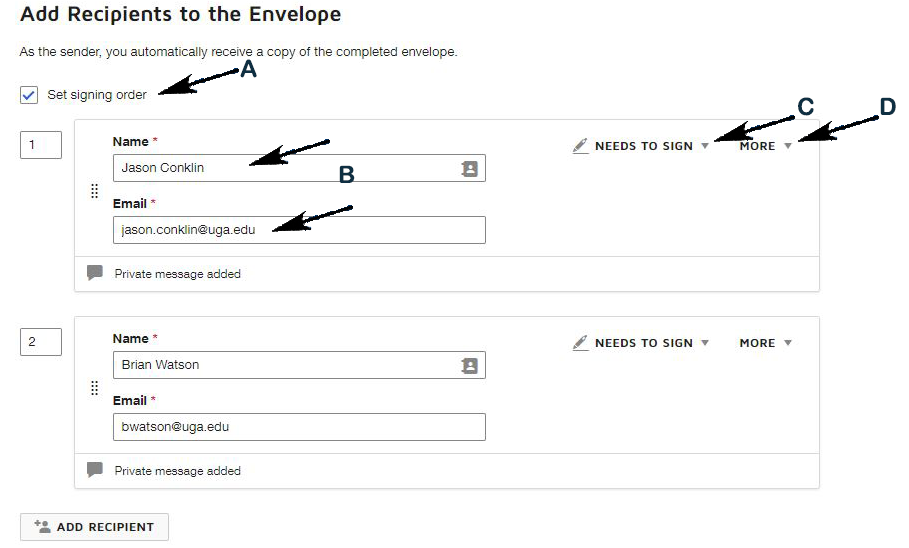
Once you’ve finished with signatories, click “Next” in the upper right hand corner.
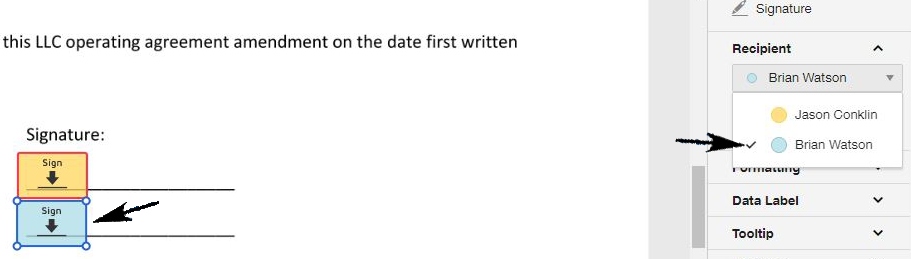
Step 3: Mark the signature line(s)
From the standard fields section on the left, drag the “Signature” icon to the signature line of your document. If desired, you can also drag a date field next to the signature.
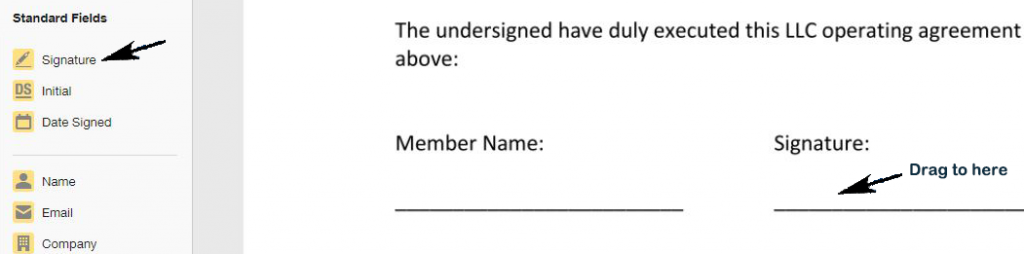
Caution! If there are multiple signatories, do not drag all the signature lines at once. Instead, you must select the appropriate person before dragging that person’s signature line. Click on the first person, and then drag their signature. Choose the second person from the list, and then drag a second signature field. Do this for each signature, date, etc. You will know that you’re doing it right if the signature icon matches the color of the signatory’s name.
Step 4: Send your document!
This is the easiest part yet.
Once all fields are accounted for, click “Send” in the top right corner.
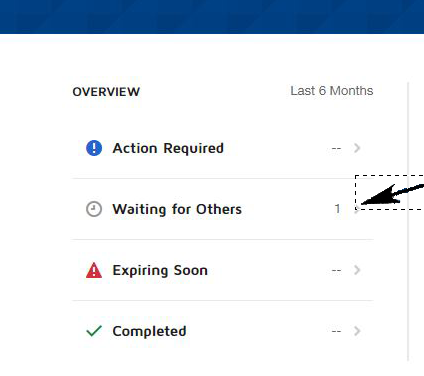
Checking the status of your document
From the Docusign home screen you can select “Waiting for Others” to see who has yet to sign, or “Completed” where you may download the fully signed document. You will also receive emails as signatories have signed.
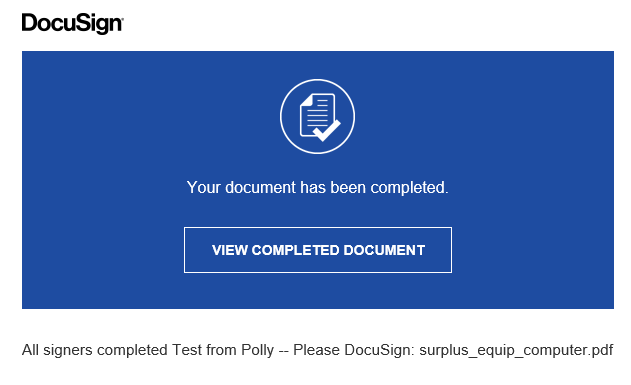
When your document is completed you will get an email. You can view and download the document if desired.
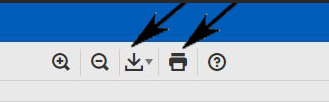
Just use the tool bar at the top to download and/or print.
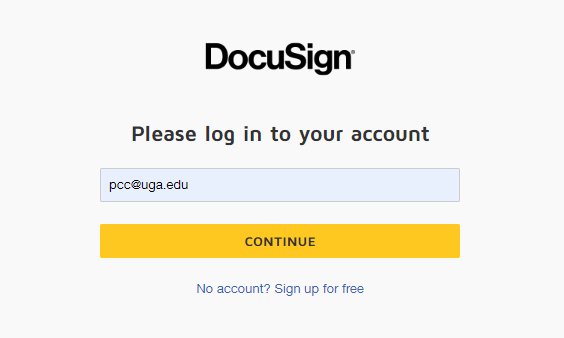
Logging in
Log into DocuSign at https://account.docusign.com/. Enter your MYID and click Continue. Then enter your DocuSign password and click Log In.
Let us know if you have any trouble! oithelp@uga.edu