1. Schedule a Zoom meeting with a waiting room
Log in to Zoom and click the “Schedule a New Meeting” button.
Include “Virtual Office Hours” or something similar in the Topic field. This is what students will see upon entering the virtual meeting.
You may want to add a description that will appear on the students’ wait screen. It might say something like “Please be patient. I am helping another student right now. I will be with you very soon.”
Set the time and date. Check the recurring box if you will have standard times each week.
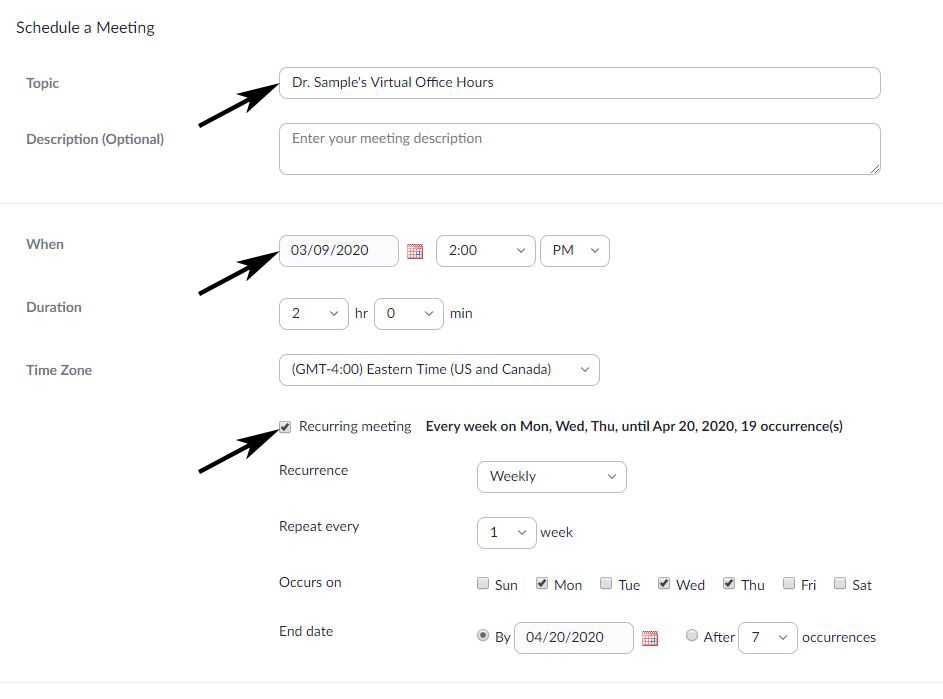
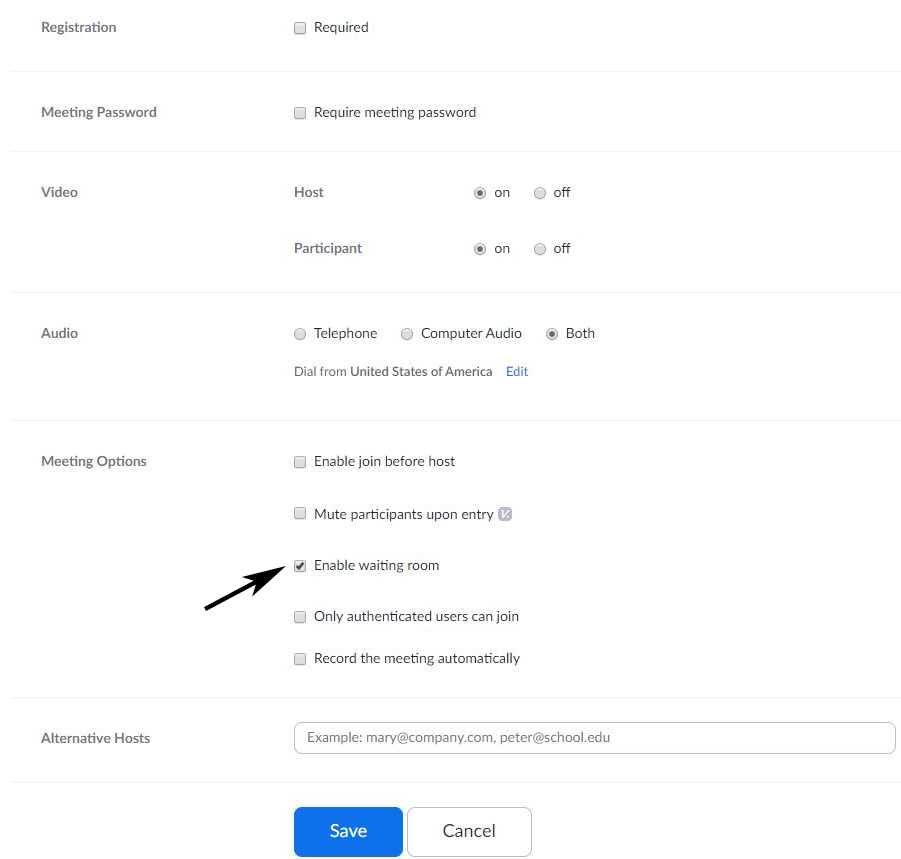
Enable the waiting room option for your meeting. This will allow you to speak with only one student at a time. All others will remain in the waiting room until their turn.
2. How to use your virtual office
Log in to Zoom and start your meeting at least 5 minutes before it is scheduled to begin.
Waiting students will see a message that says, “Please wait, the meeting host will let you in soon,” followed by the topic and description you entered previously.

To admit students, first open your participants list. Any students that have already clicked on the meeting link will appear in the participants list as “waiting”. Click the “Admit” button beside a student’s name to allow them into the meeting.
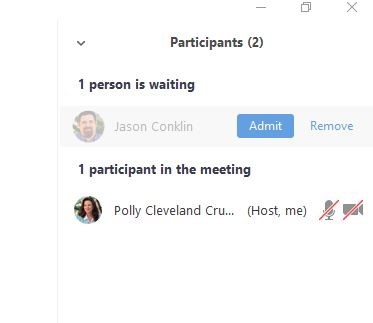
When you are finished helping a student, the student can either leave the Zoom meeting or you can move them back in to the waiting room. Then you are ready to admit other students.
If you have any questions or problems, contact the OIT Service Desk at oithelp@uga.edu.